Multi Repetitor#
Four-channel algorithmic rhythm and accent sequencer.
Overview#
Multi Repetitor is the long-awaited sequel to our classic rhythm sequencers, Numeric and Zularic Repetitor, now with even more rhythm types and 500% more faders. Choose from Numeric, Zularic, or Euclidean rhythm banks, then use the Prime fader to select a base rhythm. Once you’ve got a groove going, tweak the Factor sliders to algorithmically – or is it algo-rhythmically? – modify the output patterns. Four trigger outs drive your drum voices, and their respective Accent outputs bring an extra dimension of fun and funk to your patterns. Designed for on-the-fly performance and tweaking, the faders and rhythm banks can be CV controlled for hands-free rhythm creation, too.
- Type: Algorithmic rhythm generator
- Size: 10 HP
- Depth: .8 inch
- Power: 2x5 Eurorack
- +12 V:
40 mA - -12 V:
18 mA
Etymology#
Multi -- from Latin multus: "many"
Repetitor -- from Latin repetito with suffix -tor to make the noun: "thing which repeats"
"Thing which repeats many things"
Power#
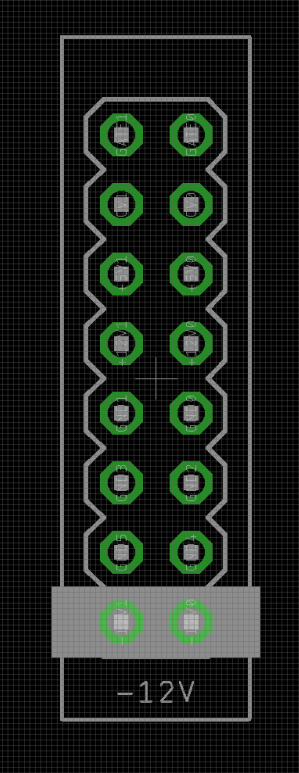
To power your Noise Engineering module, turn off your case. Plug one end of your ribbon cable into your power board so that the red stripe on the ribbon cable is aligned to the side that says -12 V and each pin on the power header is plugged into the connector on the ribbon. Make sure no pins are overhanging the connector! If they are, unplug it and realign.
Line up the red stripe on the ribbon cable so that it matches the white stripe and/or -12 V indication on the board and plug in the connector.
Screw your module into your case before powering on the module. You risk bumping the module's PCB against something metallic and damaging it if it's not properly secured when powered on.
You should be good to go if you followed these instructions. Now go make some noise!
Noise Engineering modules are reverse protected. If you accidentally installed it with the red stripe up, simply remove the power and place it correctly.
A final note. Some modules have other headers -- they may have a different number of pins or may say "not power". In general, unless a manual tells you otherwise, do not connect those to power.
Quick start#
Tap a tempo with the RESET TAP button.
Patch the four TRIG outs to drum voices in your system.
Set the ACCENT switch to the right position, and SET and MODIFY to the left positions.
Adjust PRIME, and FACTOR 1-4 to generate and modify rhythms.
Patch the ACCENT outs to accent or CV inputs on your drum voices to create more dynamic patterns.
Explore different PRIME rhythms by changing the position of SET.
Explore different rhythm modification algorithms by changing the position of MODIFY.
Turn accents off by flipping ACCENT to the left position, or varying their patterns in the middle and right positions.
Interface#

- PRIME (fader+CV in)
- Sets the base rhythm.
- FACTOR 1-4 (faders+CV ins)
- Modifies the rhythm for the respective channel, based on the Modify setting.
- Set (switch+CV in)
-
- Left: Rhythms from Numeric Repetitor.
- Middle: Rhythms from Zularic Repetitor.
- Right: Linear rhythms (generalized euclidian).
- MODIFY (switch)
- Selects the rhythm modification used by the Factor sliders.
- Left: Offsets the rhythm in the measure. This is the modification algorithm from Zularic Repetitor
- Middle: Multiplies the prime pattern by a value set by Factor to create a rhythm. This is the modification algorithm from Numeric Repetitor
- Right: Offsets Prime to choose a different rhythm for only one channel.
- ACCENT (switch)
-
- Left: Accents are off.
- Middle: Accents are based on the next channel’s trigger output.
- Right: Accents are based on the previous channel’s trigger output.
-
Both the unmodified and modified rhythms are computed for each channel. If either the modified or the unmodified beat match the previous/next channel, the accent state is toggled, unless there is an accent already active, in which case it is forced off. Accents are only computed on beat.
- RESET TAP (button)
- When the module is not receiving an external clock, this button acts as a tap tempo.
- When the module is receiving an external clock, this button acts as a manual reset.
- Hold until the LED turns white, then tap a tempo to return to tap tempo mode after using an external clock.
Note
For a fun performance control, hold down the button when using an external clock to mute all outputs until the button is released.
- CLOCK (trigger input)
- Clock input.
- RESET (trigger input)
- Reset input.
- ACCENT 1-4 (gate outputs)
- Accent gate outputs.
- TRIG 1-4 (trigger outputs)
- Trigger outputs, with a 50% duty cycle.
Patterns and modifications#
Multi Repetitor's base patterns can be seen below.
Set Left: from Numeric Repetitor

Set Middle: from Zularic Repetitor

Set Right: linear rhythms (generalized Euclidean)

Additionally, each modifier algorithm affects the output in different ways when the Factor faders are adjusted. Shown below are the first base rhythm of the left bank with all possible modifications.
Modify Left: Rhythmic offset

Modify Middle: Multiply

Modify Right: Prime offset

Input & output voltages#
Multi Repetitor’s Clock and Reset inputs respond to a rising edge around 1.8V.
The CV inputs have a range of 0V to +5V.
The outputs output gates around +6V.
Interface inversion#
The interface of Multi Repetitor can be inverted for faders-down orientation. To change the orientation of your module, perform the following:
-
Power off the module.
-
While holding down Reset Tap, power on the module, and release when the lights are steady.
-
Hold down Reset Tap again until the LED illuminates white.
-
Power cycle the module. On boot, the LED will illuminate
pinkto indicate normal orientation, orblueto indicate inverted orientation.
Design notes#
The original Repetitors have been staples of the Noise Engineering product line since the early days of the company. Compact, a breeze to use, fun to jam on, and surprisingly versatile, they filled a fun niche that we felt wasn’t quite filled by any other module on the market. The original Numeric and Zularic Repetitors were built on an old processor we’ve phased out of use over the past few years with not a lot of processing power and no option for user firmware updates. Because they were built when Stephen was just doing all of this on a lark and just having fun, they were also built in assembly which is…not anyone else at Noise Engineering’s idea of fun, but there you have it.
We discussed a sequel to both modules length and over several years, but a common issue arose: adding new features created a layer of complexity that lost the immediate fun of the original designs, but without new features, a sequel made no sense. Many, many ideas were discussed: MIDI playback, USB capabilities, externally editable rhythms, alternate firmwares, ways to save rhythms… Nothing felt quite right until we realized that keeping things simple was key.
In the end, we decided to keep the fundamental design of the originals identical, but flesh out the features of the source material. We rethought the rhythm-bank switch, allowing us to keep all of the original source patterns as well as and add in a new bank of fun patterns. We added an extra parameter so that all four outputs could be modified, and we moved to faders instead of potentiometers since we love them on performative modules like Confundo Funkidos and Lapsus Os. Accent outs, tap tempo, and a modification algorithm switch rounded out the redesign, and we had a module that could work identically to the originals, or in completely new ways, while keeping the core workflow of the classics.
Numeric and Zularic Repetitor have been in countless cases for nearly a decade, and we hope that Multi Repetitor brings even more fun and inspiration to a new generation of patches.
Warranty#
We will repair or replace (at our discretion) any product that we manufactured as long as we are in business and are able to get the parts to do so. We aim to support modules that have been discontinued for as long as possible. This warranty does not apply to normal wear and tear, including art/panel wear, or any products that have been modified, abused, or misused. Our warranty is limited to manufacturing defects.
Warranty repairs/replacements are free. Repairs due to user modification or other damage are charged at an affordable rate. Customers are responsible for the cost of shipping to Noise Engineering for repair.
All returns must be coordinated through Noise Engineering; returns without a Return Authorization will be refused and returned to sender.
Please contact us if you think one of your modules needs a repair.
Special thanks#
-
Mr. Proto
-
Everyone who had fun with the originals over the years