Ruina Versio Manual#
Stereo distortion with wavefolding, octavizing, phase shifting, multiband saturation, notch filtering, and DOOM
Screen reader accessible documentation
Overview#
Ruina Versio answers the age-old question: how many different types of distortion can we fit on a single module? The answer is a lot, as it turns out. Need a wavefolder? We got a wavefolder. Want some multiband distortion? Of course you do! And that's not even including the DOOM parameter!
We also decided that Smoosh was a parameter we needed in our lives: press it and add 128 dB of drive. Yes, you read that right: 128 dB. Why have SOME drive when you can have ALL the drive?
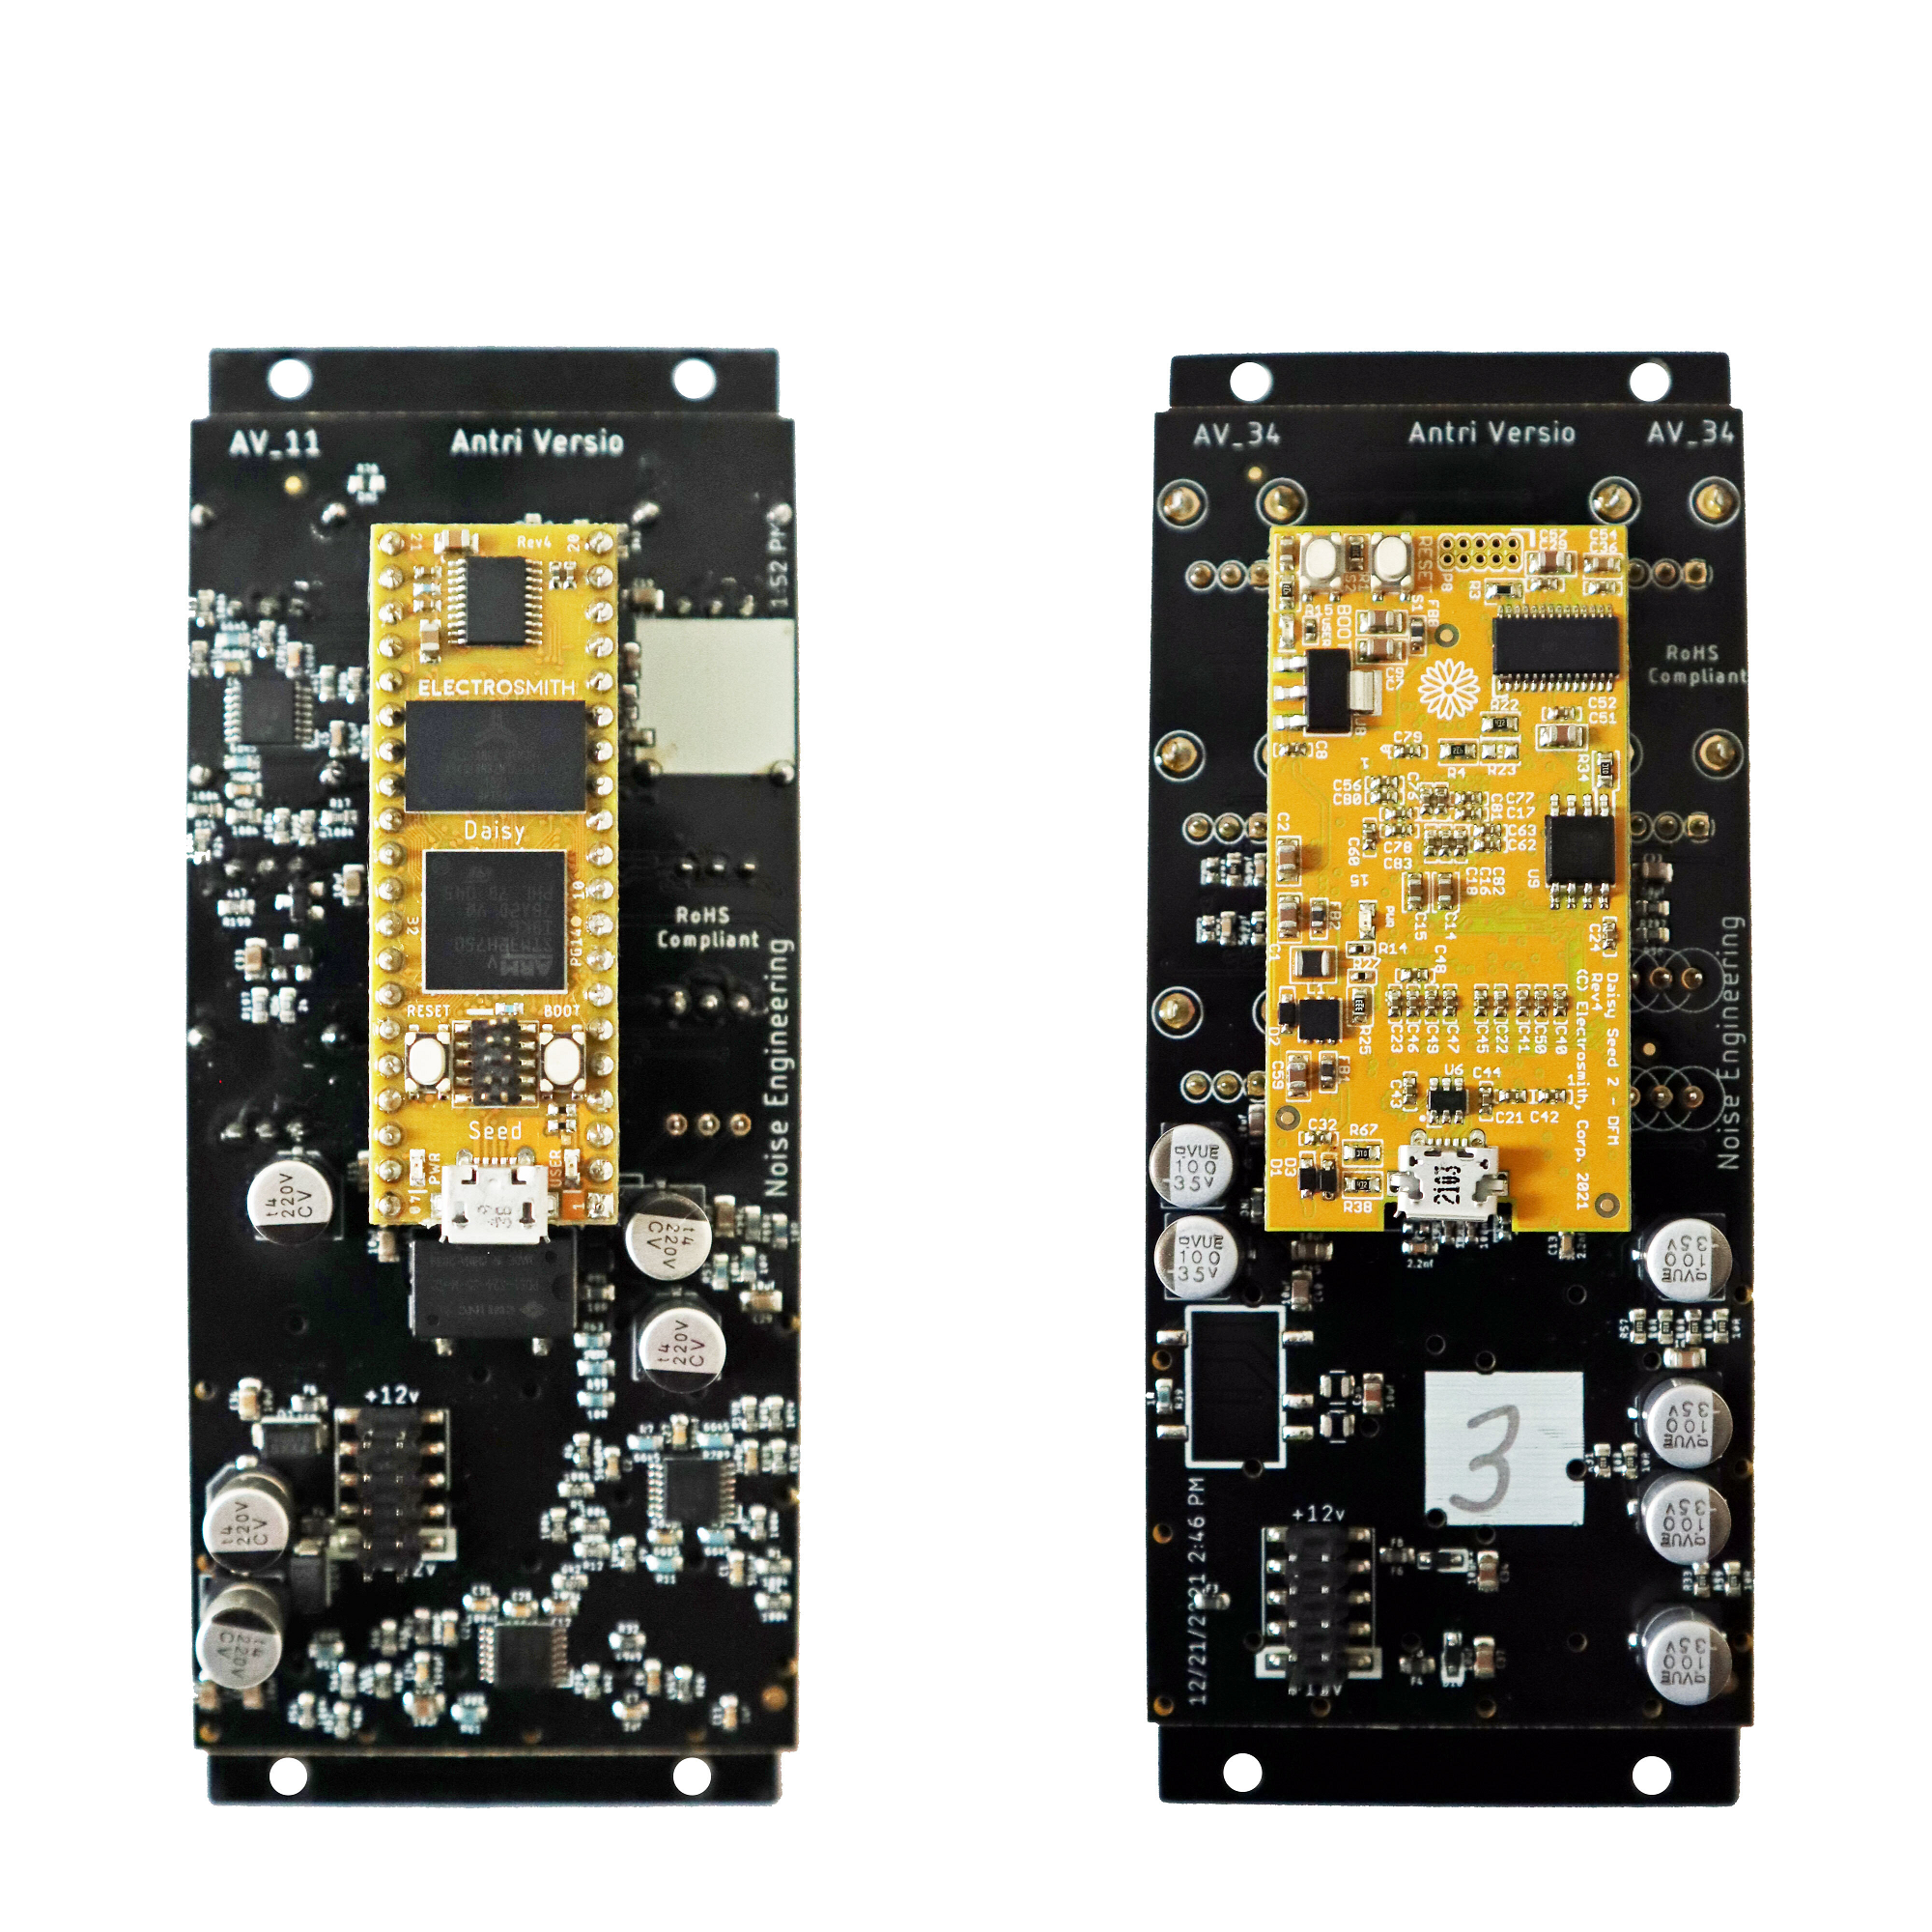
Not only is Ruina Versio a unique distortion, it's a stereo DSP platform. A simple USB connection allows you to update Ruina Versio to a variety of firmwares. Open-source support is available, too, which allows you to write your own firmware! All info can be found on the World of Versio page here.
- Type: Stereo distortion
- Size: 10 HP
- Depth: 1.5 inches
Etymology#
Ruina -- from Latin: "destruction"
Versio -- from Latin: "Versatile"
"Versatile Destruction"
Color code#
On boot, the Versio's LEDs will shine with this color pattern to indicate that it is running the current Ruina Versio firmware.

Power#
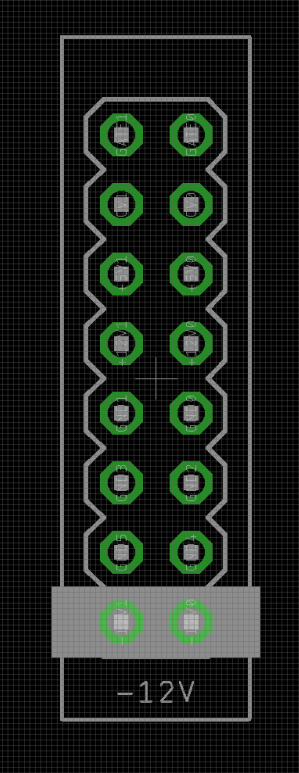
To power your Versio, turn off your case. Plug one end of your ribbon cable into your power board so that the red stripe on the ribbon cable is aligned to the side that says -12 V and each pin on the power header is plugged into the connector on the ribbon. Make sure no pins are overhanging the connector! If they are, unplug it and realign.
Line up the red stripe on the ribbon cable so that it matches the white stripe and/or -12 V indication on the board and plug in the connector.
Screw your module into your case before powering on the module. You risk bumping the module's PCB against something metallic and damaging it if it's not properly secured when powered on.
If your Versio looks like the left picture, it requires 70mA +12v and 70mA -12v. If it looks
like the right picture, it requires 125mA +12v and 10mA -12v. Versio does not use the
+5v rail.
You should be good to go if you followed these instructions. Now go make some noise!
Input & output voltages#
All CV inputs expect 0 V to 5 V. All pots act as offsets and sum with the input CV. The FSU gate input responds to signals above 2 V. The audio inputs clip around 16 V peak to peak.
Interface#

- Blend
- Dry/wet balance control. When turned fully left, the unmodified input signal is passed through. Fully right, only the processed signal is heard. Points in the middle give you a mix of both.
- Fold
- Wavefolder, based on the Noise Engineering Infinifolder that appears on many modules like the Basimilus Iteritas Alter.
- Center
- Width and position of the multiband saturator center band.
- DOOM
-
Doom is a suboctave chorus. Imagine it like a suboctave generator, but evil: as you turn it up, the louder the suboctave is, and the more out-of-tune it becomes. In the top quarter of the knob, overtone buzz is added to the suboctave chorus.
If you've ever wanted to emulate a swarm of bees descending on your waveforms, this is the knob for you.
- Phase
- Phase shifts the left and right signals to create stereo width and/or phasing effects.
- Drive
- Multiband saturator, inspired by our Seca Ruina module. Emphasizes the four different bands, isolating the lowest when turned fully counterclockwise and the highest turned fully clockwise. Blends through low, low-mid, high-mid, and high bands at other settings.
- 8vize
- A full-wave rectification distortion, inspired by our Pura Ruina module.
- UND/X/OVR
- Sets the signal flow:
UND: Fold → DOOM → Rectify → SaturateX: Fold → Saturate → Rectify → DOOMOVR: Fold → DOOM → Rectify → Saturate → Fold (again)
- OFF/ON/TRK
- Notch filter:
OFF: Off.N: Fixed-frequency notch at1 kHz.TRK: Tracks the frequency of the Center knob.
- Smoosh
- Press or trigger with a gate for
128 dBof gain. - In L/In R
- Audio input. If R is not patched, the signal from L is normaled to both inputs.
- Out L/Out R
- Stereo output pair.
Patch tutorial#
- First patch
-
Start by patching a saw wave into the L input, and patching the Out L and R jacks to your mixer. Set Center, Drive, Phase, and 8vize to 12:00. Set Doom and Fold fully counterclockwise, and Blend fully clockwise. Set both switches to the leftmost position. This is the least distorted that Ruina Versio will get... it's all destruction from here.
Start by playing with Fold, Doom, Drive, and 8vize: these are the main controls for the four types of distortion on Ruina Versio.
Try different Phase settings to change the phasing of your signal and add stereo width.
Center and the OFF/ON/TRK switch change the frequencies emphasized and cut in your signal.
Try different UND/X/OVR settings for different signal chains and distortion flavors.
Lastly, hit Smoosh and really annihilate your signal.
- Drum crusher
- Use Ruina Versio to spice up your drum loops: start with Blend at 12:00 and Fold and Doom fully counterclockwise. Start by using Drive, Center, and 8vize to spice things up... and hit Smoosh to add some squish. Past that, try out all the other knobs and settings and really destroy your percussion completely.
- Smoosh sequencing
- Smoosh sounds awesome when triggered with gate and trigger patterns: try it on simple waveforms to create an enveloping effect. Or, try distorting some drums and mult one of your drum triggers to Smoosh. Or, use random triggers to spice up any distorted patch.
Firmware swapping#
Use our firmware swap app to change your platform module's firmware at any time.
To get started:
- Turn off the power to your case and unscrew the module.
- Remove the power connector on the back of the module.
- Plug a micro USB connector into the port on the pack of the module, and the other end into your computer.
- Follow the instructions in the firmware swap app.
Warranty#
We will repair or replace (at our discretion) any product that we manufactured for one year after initial purchase as long as we are able to get the parts to do so. This warranty does not apply to normal wear and tear, including art/panel wear, or any products that have been modified, abused, or misused. Our warranty is limited to manufacturing defects.
Warranty repairs/replacements are free. Repairs due to normal wear, user modification, or other damage are charged at an affordable rate. Customers are responsible for the cost of shipping to Noise Engineering technicians for repair.
All returns must be coordinated through Noise Engineering; returns without a Return Authorization will be refused and returned to sender.
For immediate issues with new modules, please contact your dealer for a replacement. Otherwise, please contact us if you think one of your modules needs a repair.