Quantus Trajecta Manual#
Quad polyphony-oriented envelope with jammable universal controls.
Screen reader accessible documentation
Overview#
Quantus Trajecta is a quad envelope designed with polyphony in mind. Each control universally adjusts all four envelopes, so keeping separate voices related on the fly is easy. Borrowing the structure of the envelope from the Cursus Iteritas Percido and adding even more shape control and a third mode, QT is musical, performable, and utilitarian.
- Type: Poly envelope generator
- Size: 10 HP
- Depth: .9 inches
- Power: 2x5 Eurorack
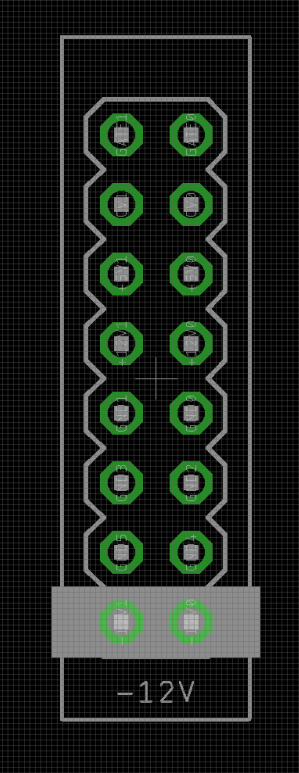
- +12 V:
40mA - -12 V:
10mA
Etymology#
Quantus -- from Latin: "how many"
Quantus -- from Latin: "journey"
"Many journeys"
Power#
To power your Noise Engineering module, turn off your case. Plug one end of your ribbon cable into your power board so that the red stripe on the ribbon cable is aligned to the side that says -12 V and each pin on the power header is plugged into the connector on the ribbon. Make sure no pins are overhanging the connector! If they are, unplug it and realign.
Line up the red stripe on the ribbon cable so that it matches the white stripe and/or -12 V indication on the board and plug in the connector.
Screw your module into your case before powering on the module. You risk bumping the module's PCB against something metallic and damaging it if it's not properly secured when powered on.
You should be good to go if you followed these instructions. Now go make some noise!
Noise Engineering modules are reverse protected. If you accidentally installed it with the red stripe up, simply remove the power and place it correctly.
A final note. Some modules have other headers -- they may have a different number of pins or may say "not power". In general, unless a manual tells you otherwise, do not connect those to power.
Input & output voltages#
QT’s gate inputs have a threshold of about 2 V. Its CV outputs have a range of 0 V to +5 V. Its CV inputs have a range of 0 V to +5 V; CV outside of this range will not harm the module but will be clipped.
Interface#
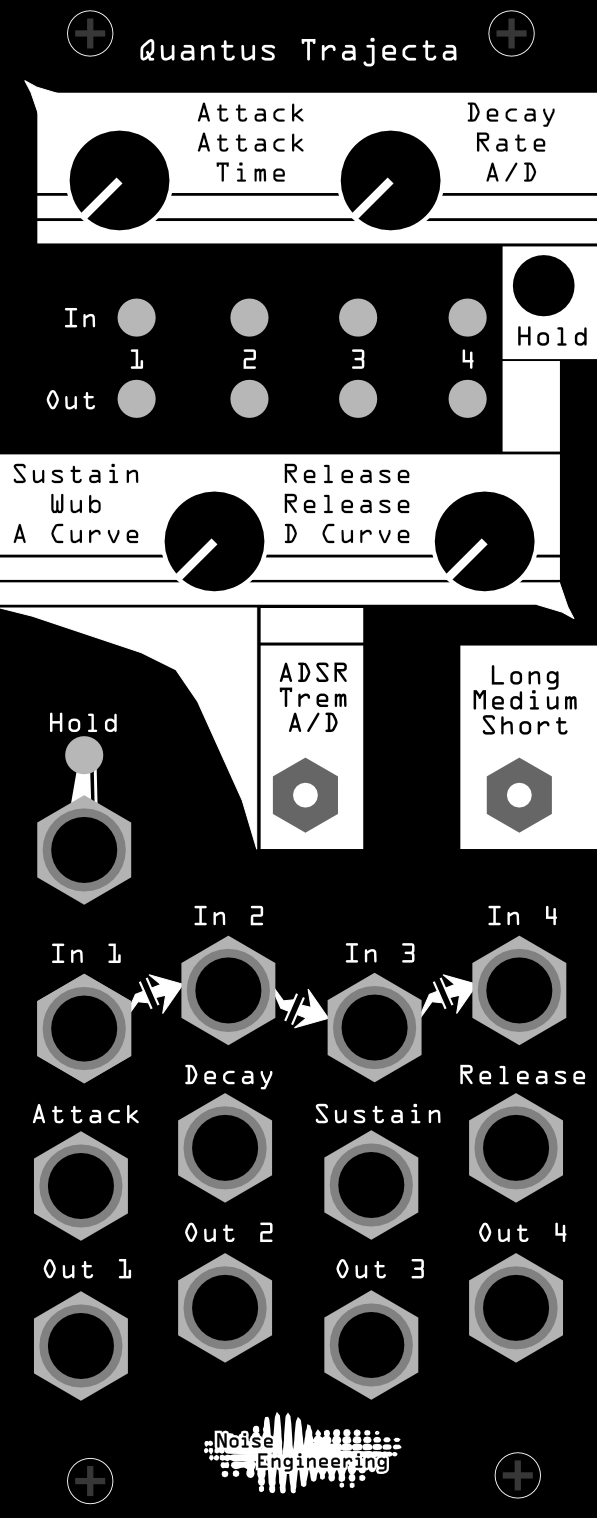
- ADSR/Trem/A/D
- Global mode setting for the four envelopes. ADSR is a traditional four-stage envelope with exponential curving for musicality. Trem is a unique three-stage envelope/LFO, useful for creating tremolo effects. A/D is a two-stage envelope with adjustable curves, similar to the envelope found on our Percido modules.
ADSR#
- Attack
- The amount of time it takes the envelope to go from minimum to maximum.
- Decay
- The amount of time it takes the envelope to go from maximum to the Sustain level after the Attack stage.
- Sustain
- After Decay, the envelope holds at the level set by this parameter while the input gate is high.
- Release
- The time it takes to go from the Sustain level to minimum after the incoming gate goes low.
Trem#
- Attack
- The amount of time it takes the envelope to go from minimum to maximum, and for the LFO to reach its maximum rate (set by Rate).
- Rate
- The maximum speed that the internal LFO oscillates.
- Wub
- The depth of LFO modulation.
- Release
- The time it takes to go from maximum to minimum after the incoming gate goes low, and for the LFO to decelerate.
A/D#
- Time
- Sets the overall envelope time (affects both the attack and decay stages).
- A/D
- Sets the ratio of attack time versus decay time within the period set by Time. Fully left, the envelope will be a simple decay. Fully right, the envelope will be only attack. Points in the middle are a mix of both, with equal attack and decay times in the center.
- A Curve
- Adjusts the curve of the attack stage, from exponential to linear to logarithmic.
- D Curve
- Adjusts the curve of the decay stage, from exponential to linear to logarithmic.
- Long/Medium/Short
- Adjusts the minimum and maximum times for the envelopes.
- Hold
- Freezes all envelopes at their current level while the button is pressed or a high gate is present at the Hold jack.
- In 1-4
- Trigger/gate inputs. Inputs are normalled from left to right; patching to an input breaks normalization.
- Out 1-4
- Envelope outs.
- CV ins
- CV over corresponding parameters. Each knob acts as an offset and sums with CV inputs.
Patch tutorial#
- Single envelope
- Patch a gate pattern to In 1, and Out 1 to the CV input of a VCA processing an oscillator. Start with all parameters centered, the rate switch set to Fast, and the mode set to ADSR. From there, experiment with Trem and A/D mode to hear the different shapes it can create, and try out some different envelope settings by changing the four parameters.
- Polyphonic control
- QT was designed with polyphonic (multiple-voice) patches in mind. The shared nature of the envelope controls makes it easy to change up to four voices with a single change, which is useful in a performance context. Patch two or more voices by running oscillators into VCAs, then controlling those VCAs with the CV outputs of QT. Run different gate patterns into each envelope’s In jack. Tuning the oscillators to different notes (for example a fifth apart or to a chord) is an easy way to create complex-sounding melodic patterns without complicated sequencing.
Design notes#
How long has QT been an idea on the books here? It seems like forever. I just looked at the repository and the first version was ready for prototype four years ago.
We have wanted to break the Percido envelope out into its own module for years. We have had paper designs for it for most of that time, but it never made it far enough along for us to really push it forward.
Our first version (QT_00) was on a different microcontroller (because four years ago). It had a minimal featureset. It had three pots and was nowhere near as interesting as this one is. It was also only 8hp, but still four gate and four cv ins, four envelopes out.
The next decade revision (QT_10) was on the new microcontroller but still only had three pots, still 8hp. The layout wasn’t ideal either: we somehow thought it would be a good idea to put a momentary in the middle of the three pots where no one but a toddler’s finger would fit.
The next revision was another decade (QT_20). Now we were a lot closer: 10hp, and almost the exact layout you have…but the LEDs were a bit close together horizontally and the bleed was fierce. Also, Markus and Stephen said, “We can fit another switch! Add it!” So we did.
In the midst of all of this, we found another part we could sub in that would bring the cost down dramatically (and we needed to test the part for future modules too) but required a bit of work. So we did another prototype.
The good news was the new part was great. The meh news was that it turned out that switch was not interesting. At all. So QT_25 was final aside from removing a switch and changing a few values to work better with the new part.
We versioned it again, and sent it off to production, at long last.
Warranty#
We will repair or replace (at our discretion) any product that we manufactured for one year after initial purchase as long as we are able to get the parts to do so. This warranty does not apply to normal wear and tear, including art/panel wear, or any products that have been modified, abused, or misused. Our warranty is limited to manufacturing defects.
Warranty repairs/replacements are free. Repairs due to normal wear, user modification, or other damage are charged at an affordable rate. Customers are responsible for the cost of shipping to Noise Engineering technicians for repair.
All returns must be coordinated through Noise Engineering; returns without a Return Authorization will be refused and returned to sender.
For immediate issues with new modules, please contact your dealer for a replacement. Otherwise, please contact us if you think one of your modules needs a repair.