Imitor Manual#
Adjustable multitap delay with up to 32 taps and a unique feedback processing structure. Create rhythmic delays, customizable comb filters, shimmering atmospheres, and more!

Overview#
Imitor is a delay designed for customization and experimentation. Many multitap delays can be intimidating, with their complicated and cumbersome interfaces, so we designed Imitor with powerful user-friendly controls and tap displays that are fun to interact with,all of which are fully automatable. Set the pre-delay, pan your taps, warp time, crescendo or decrescendo – the delay section of Imitor has so many options at your fingertips.
Play with the Tap Delay modulation section for a wide range of control: adjust modulation, relative LFO phase, speed, and stereo effect. Finally, the Processing section adds a bit of Noise Engineering flavor. Crank Regen to 11, Shimmer your sound, add some suboctaves with Doom, filter your delay with Tone, play with stereo width, or add some not-so-subtle wavefolding.
Imitor excels at long, evolving echoes and creating rhythms from a single sound, but it can also be set to extremely short delay times for comb filtering, flanging, chorus, and more.
Imitor is a delay and echo playground: if you can imagine it, you can create it with Imitor.
Installation#
Windows#
Log into portal.noiseengineering.us Navigate to the “Plugins” tab, and click the link that says “Download for Windows” Double-click the downloaded file to run it. NE Products will use your web browser to authenticate your plugins. Log into your Portal account on the webpage that opens if prompted, then return to NE Products. Click on “Install/Update Plugins”. Close NE Products, run your DAW, and your plugins will appear!
Mac#
Log into portal.noiseengineering.us Navigate to the “Plugins” tab, and click the link that says “Download for Mac” When the download completes, open the installer file and follow the instructions. Open NE Products. On Mac, it can be found with Finder in Applications or with Spotlight. NE Products will use your web browser to authenticate your plugins when you run it. Log into your Portal account on the webpage that opens if prompted, then return to NE Products. Click on “Install/Update Plugins”. Once plugins are installed, the message at the top of the screen will display “Your plugins are up to date.” Close NE Products, run your DAW, and your plugins will appear!
- Ableton Live troubleshooting
- If you've installed your plugins but they aren't showing up in Ableton Live, please open Live, navigate to the
Pluginstab inPreferences, and make sure thatUse VST3 Plug-In System Foldersis turned toOn.
Uninstallation#
Run NE Products again, and click “Uninstall Plugins.” If you’d like to also remove their preset files, click “Uninstall Plugins and Presets.” Doing this removes all presets in the factory directories, including user-created presets, so please copy any files you’d like to save to a different location before performing this action.
Shortcuts#
- Cmd/Ctrl+Click or Cmd/Ctrl+Mouse wheel
- For finer control, hold Cmd (Mac) or Ctrl (PC) while moving a parameter.
- Double click
- Resets any parameter to its default state.
- Scroll
- Hover over any parameter and scroll to adjust. Scroll+Cmd (Mac) or Scroll+Ctrl (PC) give finer control.
All of these work to edit step levels in LFO Step shape as well.
Getting Started#
Imitor includes a library of presets that cover some of our favorite Imitor patches and are great starting points for exploring what Imitor can do. In this section, we’ll go through a few basic configurations and explore some of Imitor’s parameters in use.
To load a preset, click load at the bottom left of the plugin, navigate through the subfolders to find the one you’d like to load, then select it and click Open. You can also use the Category and Preset arrows below the load button to scroll through the preset library.
Clocked echoes#
Load up the classic dotted 8th preset in the Bread And Butter category.
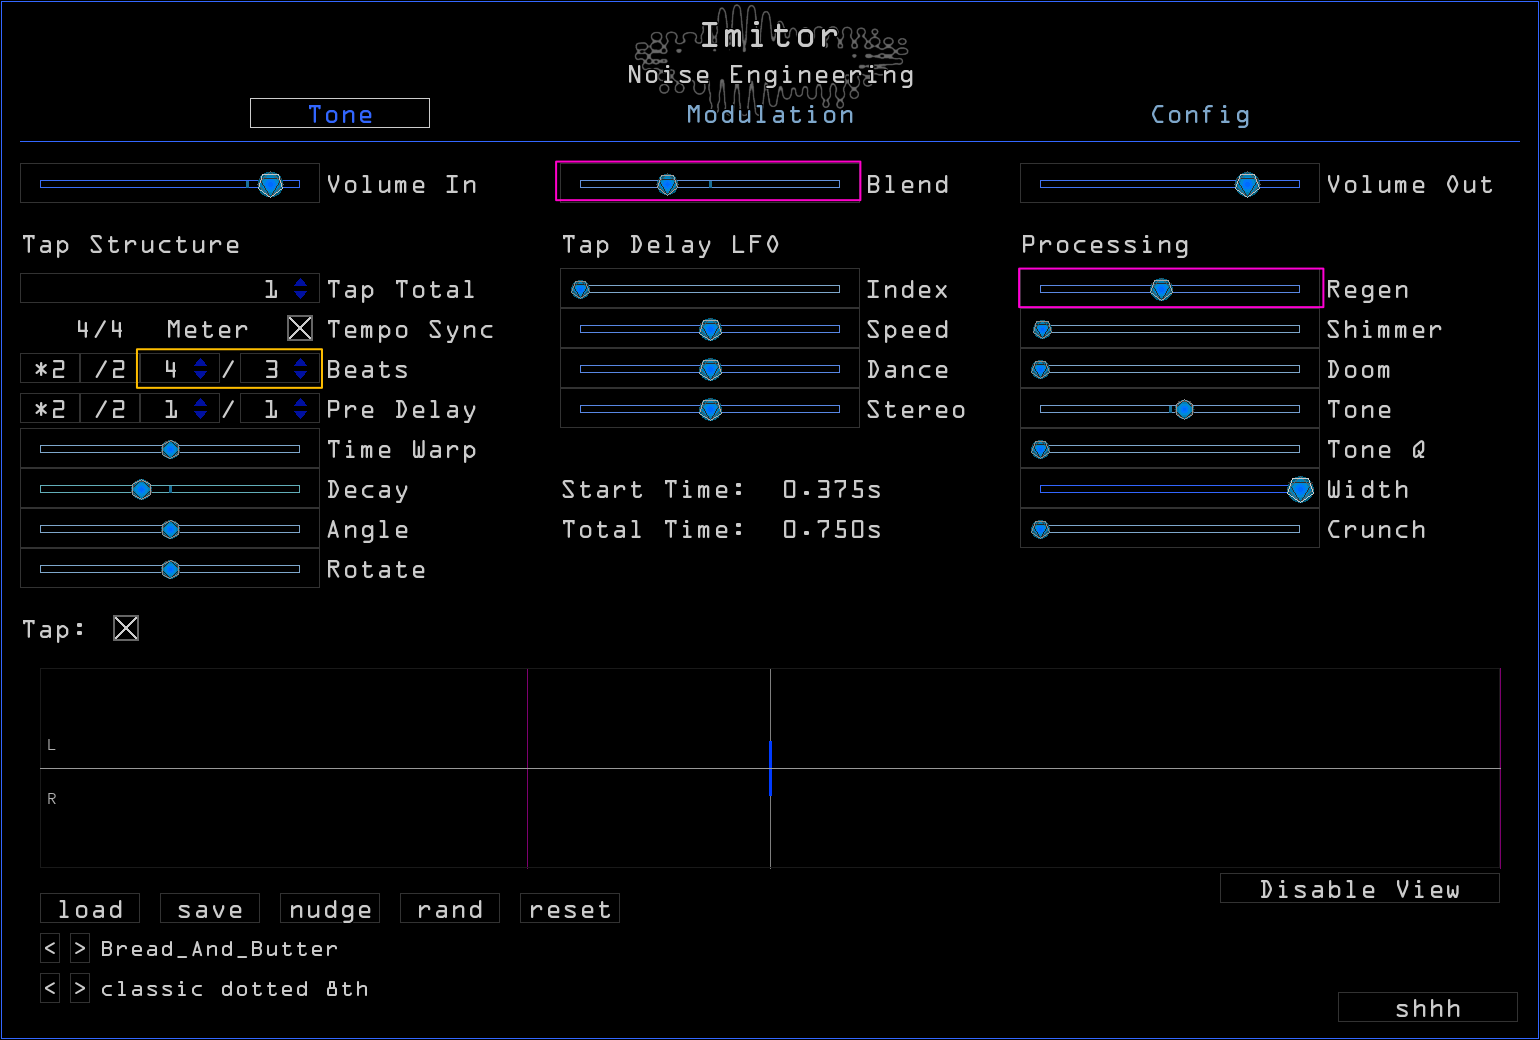
The Blend and Regen parameters (outlined in pink) will change the volume of the delay and number of echoes respectively. The Beats setting (outlined in yellow) will change the echo timing: by default, this preset plays dotted 8th notes, but by adjusting this number that timing can be changed. For example, changing the fraction to 2/1 will give 8th note echoes, and 1/1 will give quarter notes.
Multitap Rhythms#
Load up the tippity preset in the Pudding category.
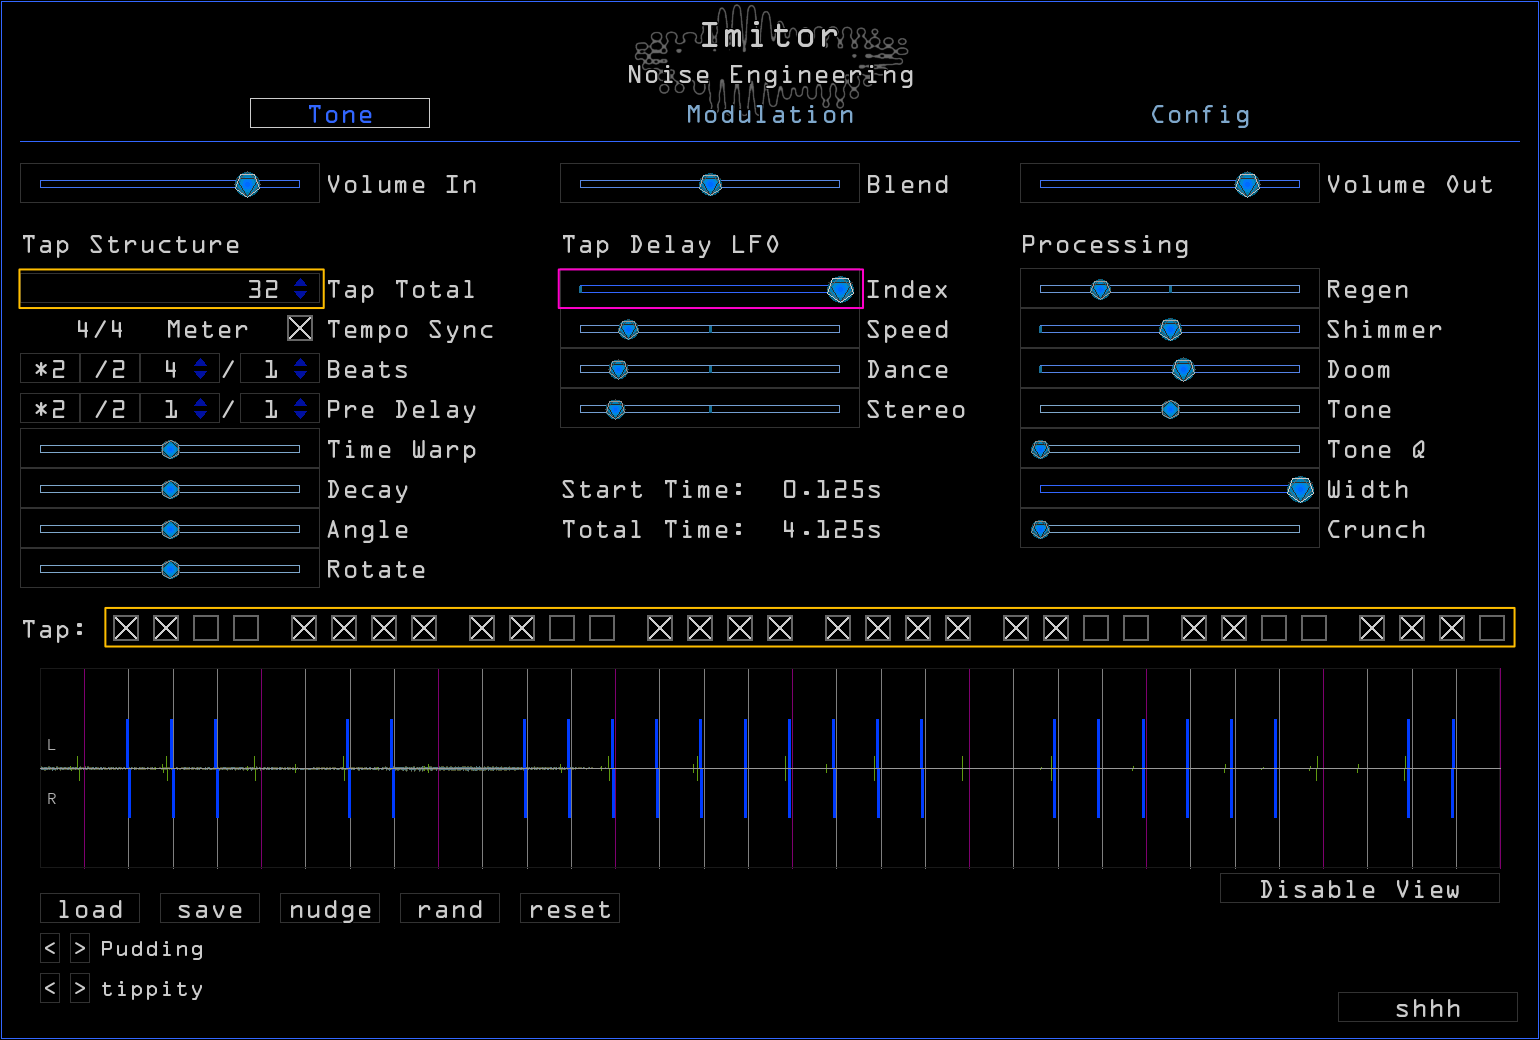
This preset uses the multitap structure of Imitor to create rhythmic patterns in its echoes. Multitap delays have different points in their delay line that can be monitored, creating echoes even when feedback (the Regen parameter) is set to 0. Imitor has a number of ways to adjust tap timing, panning, and behavior.
Try running a single pluck or drum hit through this preset and listen to the pattern that is created, then adjust that pattern with the Tap Total parameter and Tap checkboxes (outlined in yellow). Tap Total adjusts the number of audible taps, and the checkboxes enable or disable taps.
The Index parameter (outlined in pink) adjusts tap modulation: when Index is turned up an LFO is sent to the delay taps, and you’ll hear some pitch warbling as the echoes play. This can be disabled by turning Index down, and can be further adjusted by changing the settings of the parameters in the Tap Delay LFO column.
Choruses, phasers, and flangers#
Load up the chorus preset in the Bread And Butter category.
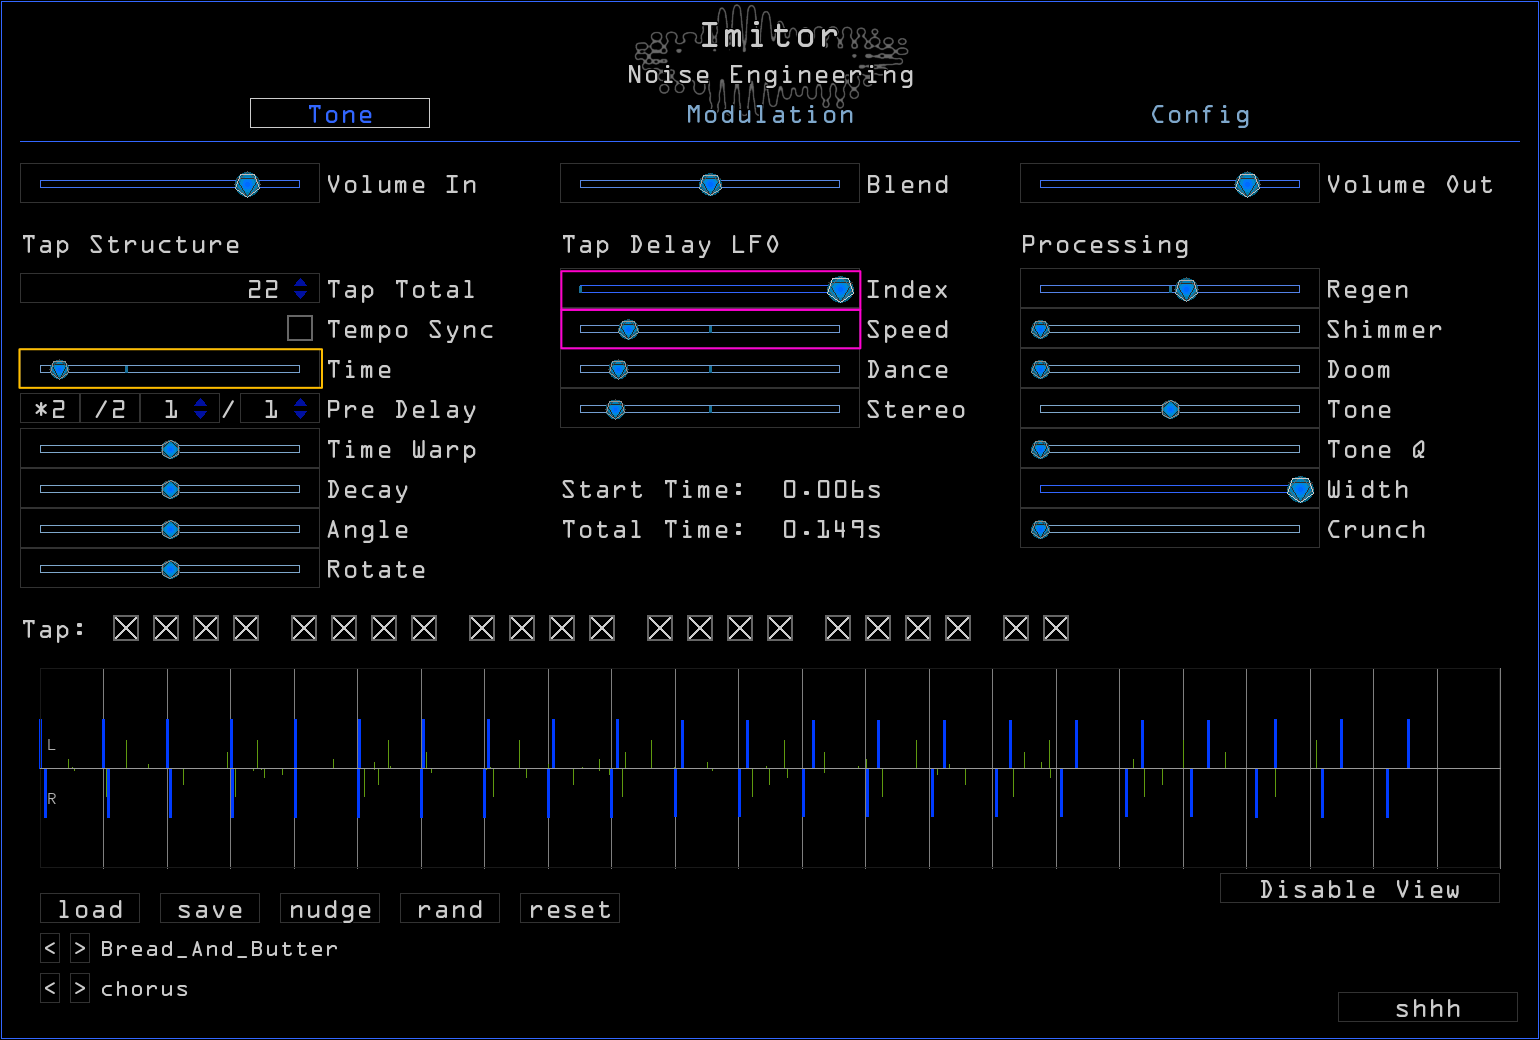
Imitor’s delay time can be extremely fast, which is perfect for creating effects like choruses, phasers, and flangers. This preset uses a low Time setting and LFO modulation to create a wide chorus. The timbre of the chorus can be adjusted with the Time parameter (outlined in yellow), and the rate and depth of modulation can be adjusted with the Speed and Index controls (outlined in pink) respectively.
Short delay times with no modulation can also be used to create resonant effects that sound almost acoustic. Try out the karp preset in the Bread And Butter category with short sounds like drums or noise bursts for some wild results.
Tone Page#
- Volume In
- Controls the level of sound coming into the plugin.
- Blend
- Controls the dry/wet balance. Fully left, the unmodified input signal is passed through. Fully right, only the processed signal is heard. Points in the middle give you a mix of both.
- Volume Out
- Sets the output level of the plugin.
Tap Structure#
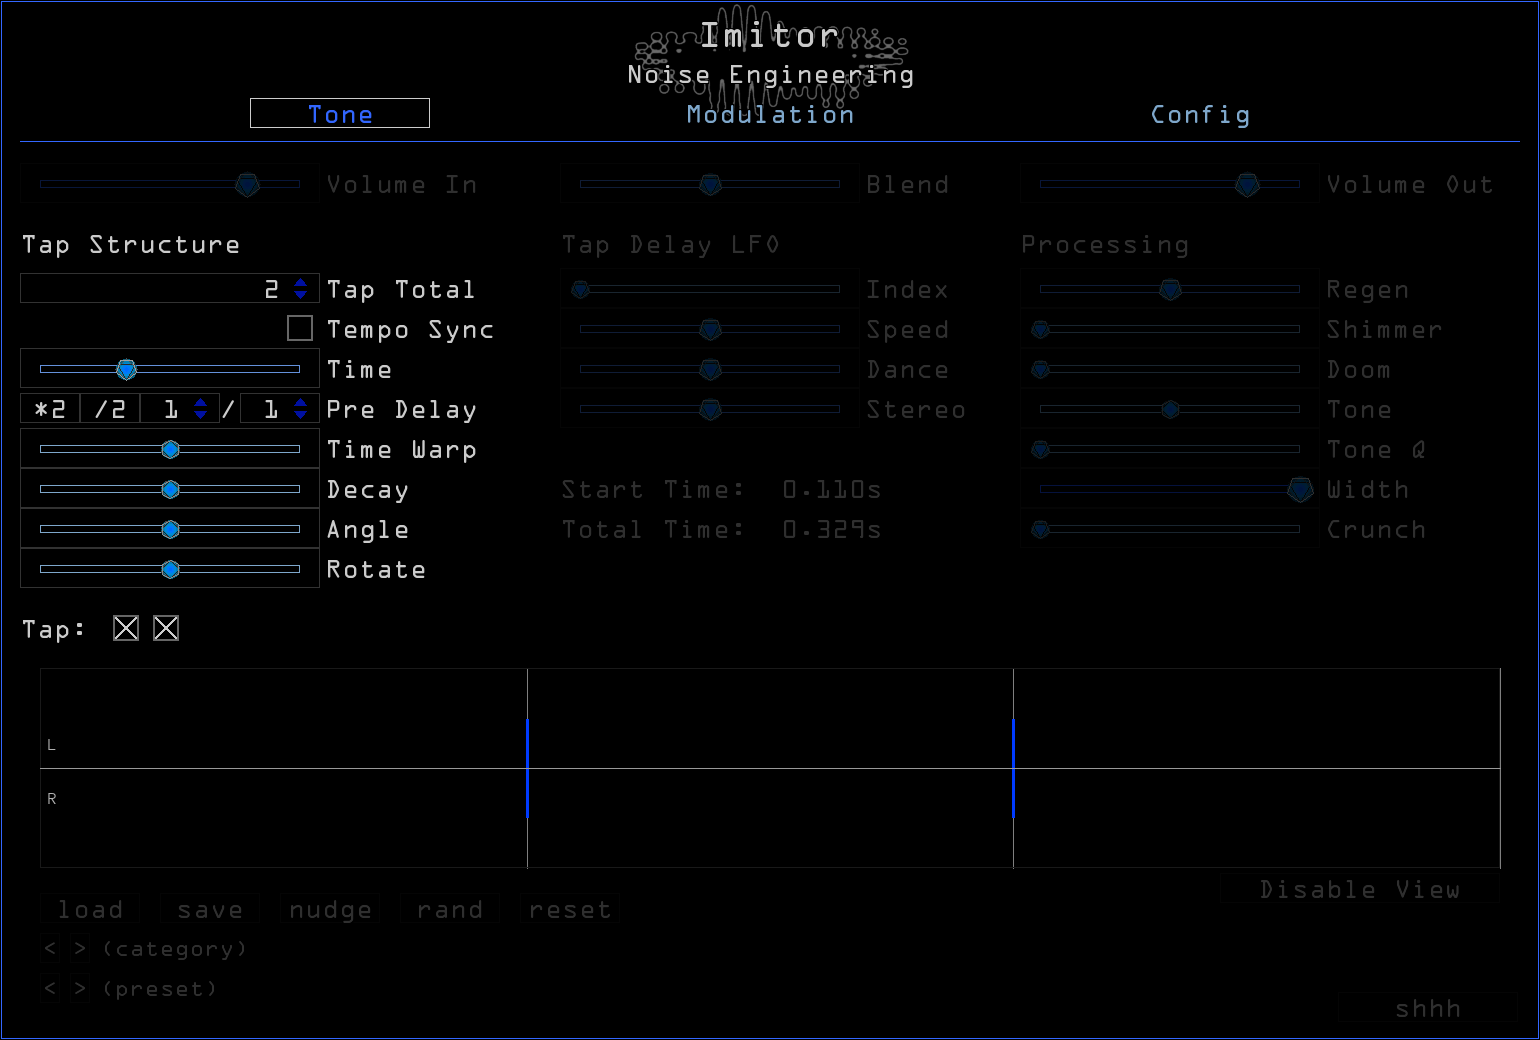
- Tap Total
- Sets the number of taps. With regen at minimum, this will be the number of echos heard.
- Tempo Sync
- When unchecked, Imitor’s delay time is unsynced. When checked, Imitor’s delays are synced with the DAW tempo and meter.
- Time (Tempo Sync disabled)
- Sets the amount of time between taps in seconds. At low settings echoes occur at audio rates, useful for effects like comb filtering and flanging.
- Beats (Tempo Sync enabled)
- Sets the amount of time between taps in seconds; divisions/multiplications are presented as a fraction. For example, a 16th note delay would be set with 4/1.
- *2 /2 (Beats, Tempo Sync enabled)
- Doubles/halves the delay time.
- Pre Delay
- Sets the amount of time between an input sound and the first delay tap. Pre delay time presented as a fraction of the Time or Beats setting. For example, a predelay twice the length of the delay time would be set with ½.
- *2 /2 (Pre Delay)
- Doubles/halves the pre-delay time.
- Time Warp
- Bipolar; warps the tap timing to start slow and speed up right of center, or start fast and slow down left of center. Tap spacing is even when control is centered. Note that this parameter only affects tap timing when Tap Total is set to 3 or greater.
- Decay
- Bipolar; changes whether the taps crescendo to the left, have equal level in the center, or decrescendo to the right.
- Angle
- Bipolar; adjusts tap panning. This parameter works in conjunction with the Rotate parameter: Angle sets the panning of the first tap, and Rotate offsets the pan of the following taps.
- Rotate
- Bipolar; offsets tap panning based on position of Angle.
- Tap (1-32 checkboxes)
- Tap enable/disable checkboxes. Taps are muted when unchecked. Useful for creating rhythmic delays.
Tap Delay LFO#
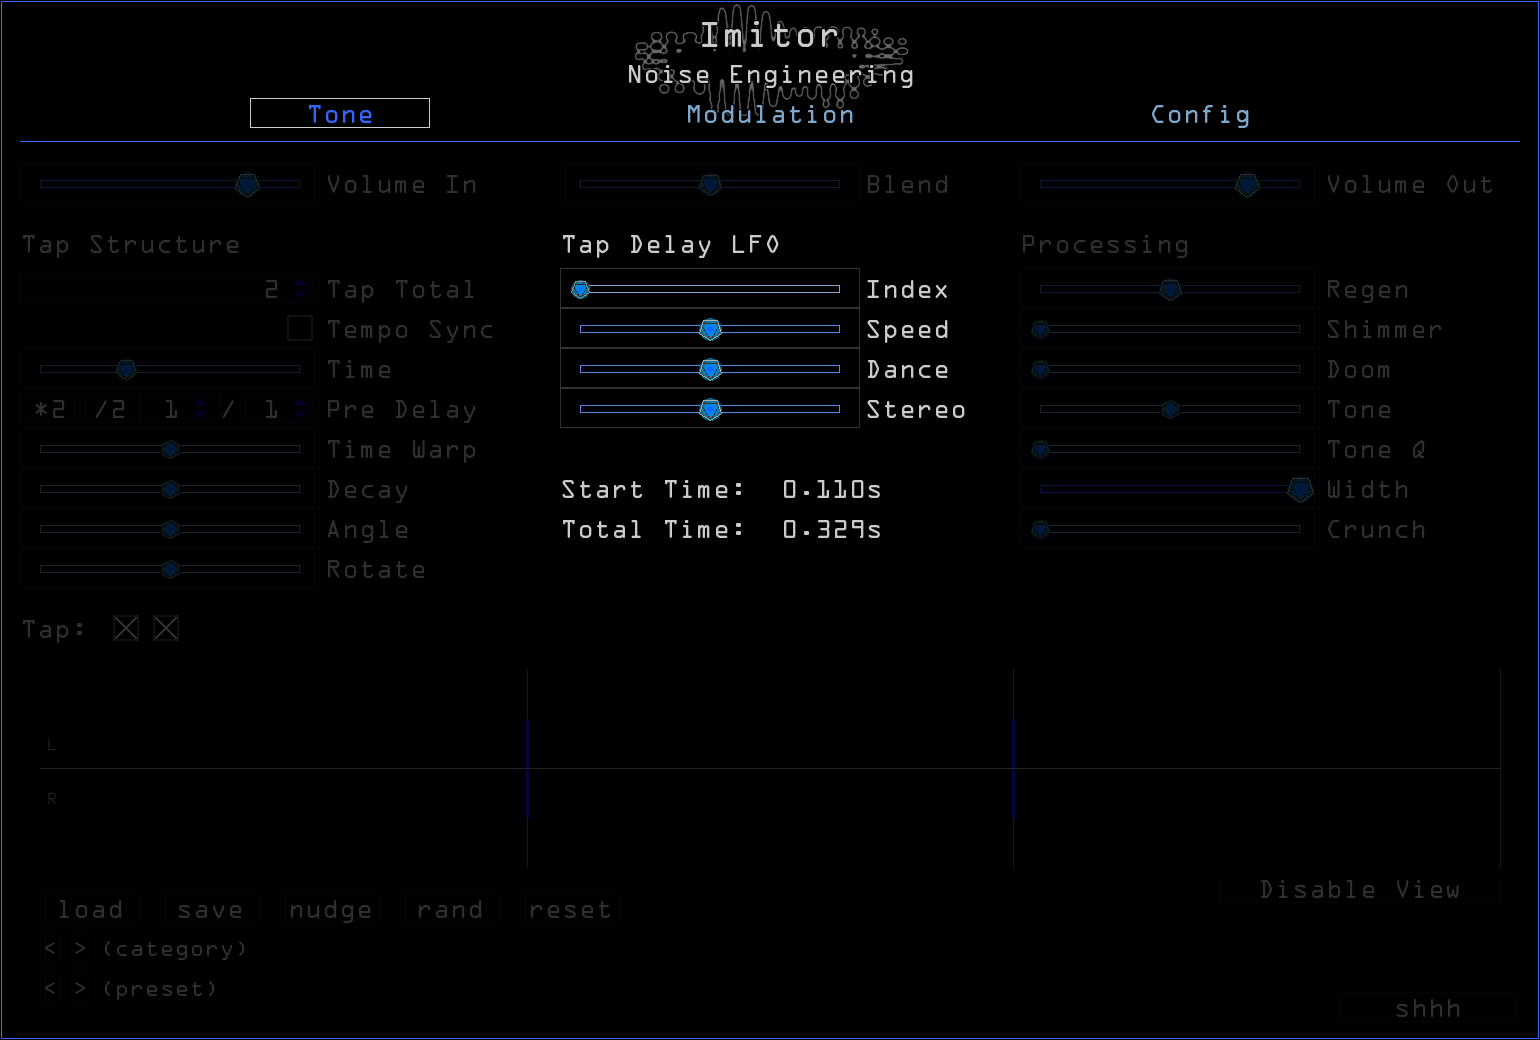
- Index
- Sets the amount of LFO modulation sent to the taps.
- Dance
- Changes the relative phase of the LFOs used to modulate the timing of each tap.
- Speed
- Sets the speed of the LFO.
- Stereo
- When set to the left, the LFOs modulate left and right taps equally. As this parameter is increased, left and right tap modulation is decoupled, creating a wider stereo sound.
Processing#
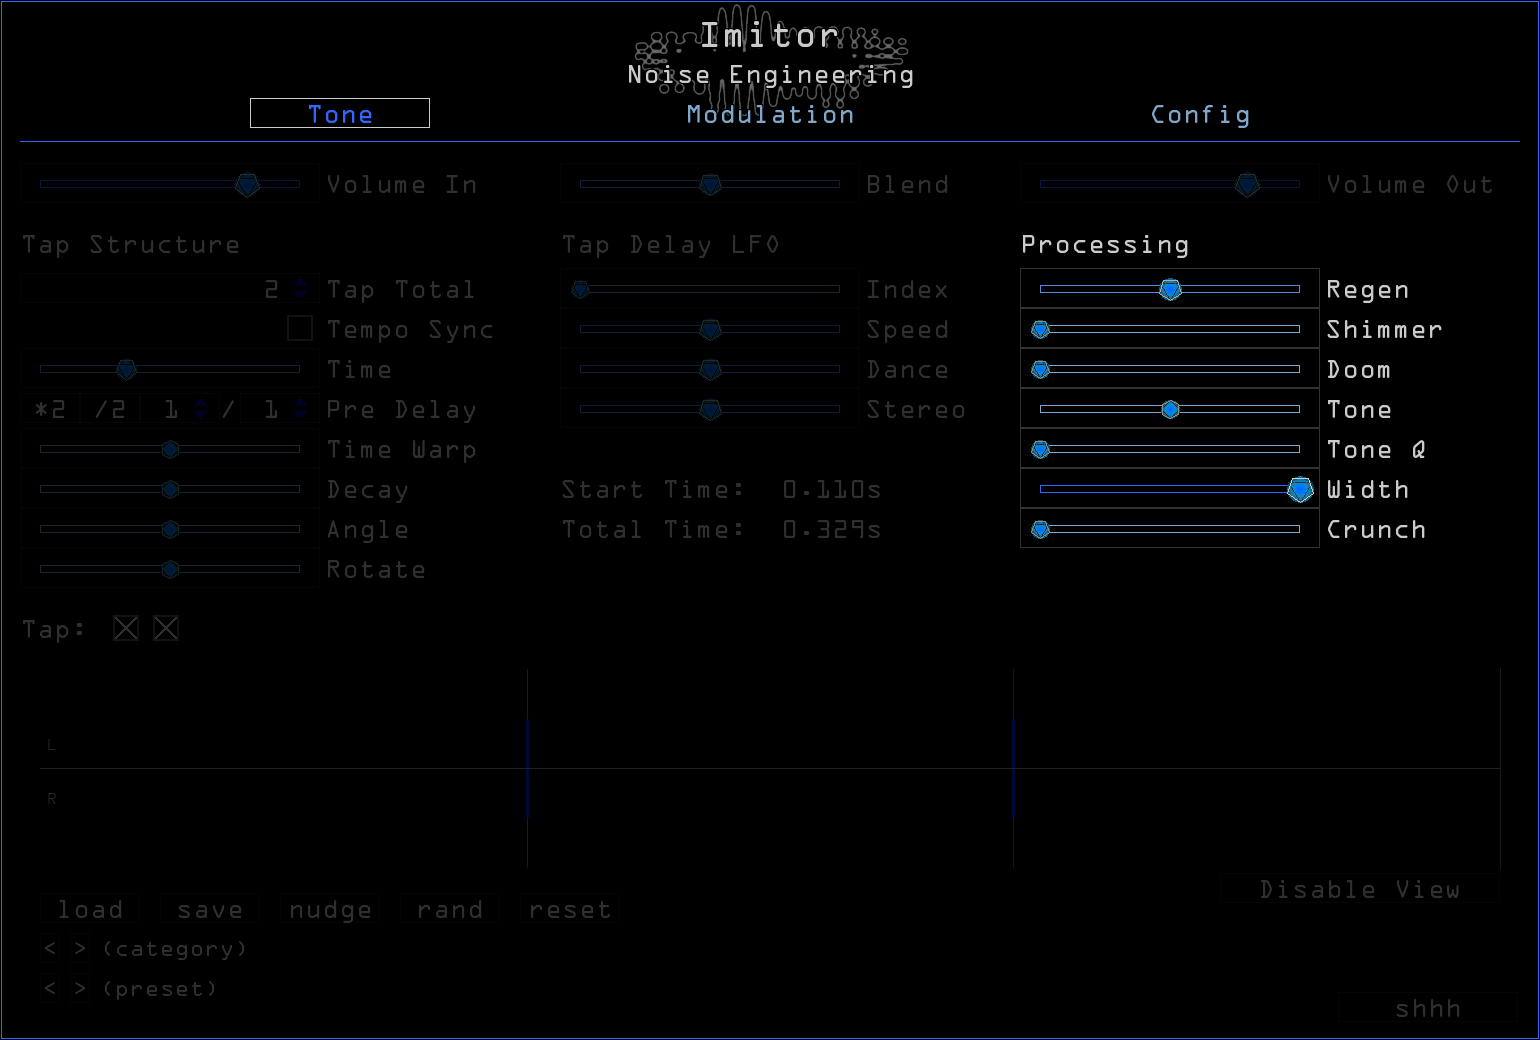
- Regen
- Sets the feedback amount. Goes well above 100%.
- Shimmer
- Adds a one-octave pitch shift to the feedback loop. Only audible when Regen is above 0%.
- Doom
- Adds a chaotic suboctave shift to the feedback loop. Only audible when Regen is above 0%.
- Tone
- Bipolar; controls the filter in the feedback loop. Functions as a lowpass filter to the left and highpass filter to the right. Filter is bypassed in the center.
- Tone Q
- Resonance level for the Tone filter.
- Width
- At left, the feedback loop is mono. Stereo width is increased as the slider is moved to the right.
- Crunch
- A not-so-subtle wavefolding effect at the end of the delay signal chain.
Presets#
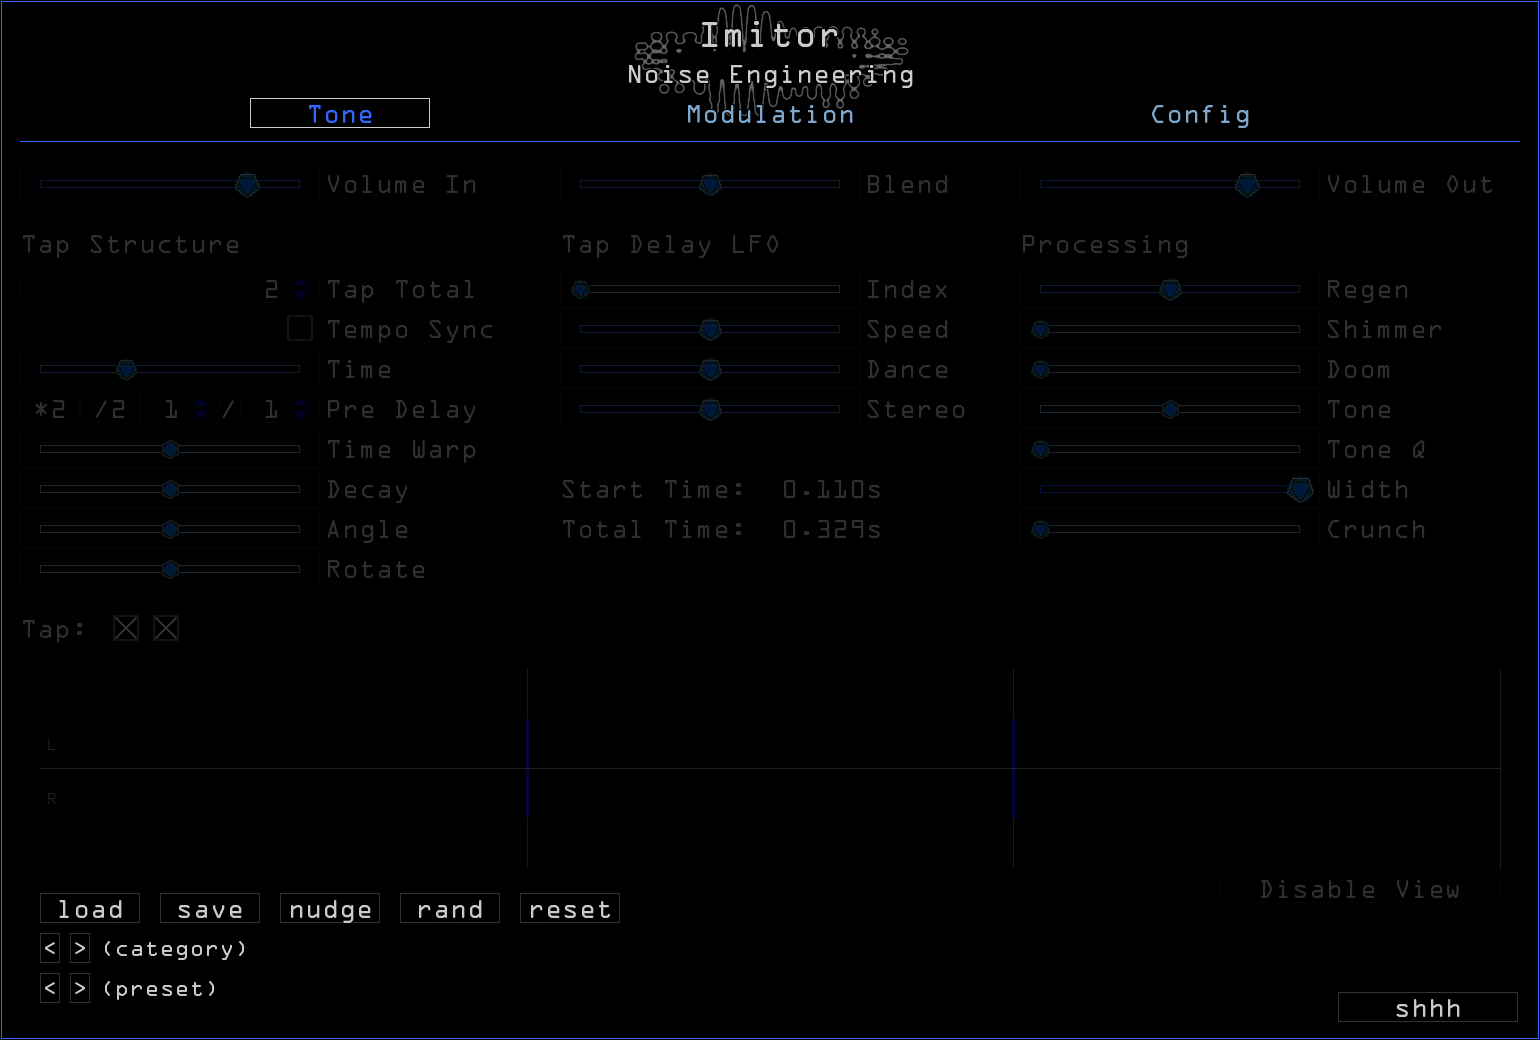
Presets are stored in the computer’s file system, and the controls below allow for modification and navigation through the files and folders of presets. You can create a new preset “Category” by creating a subfolder in the preset directory, and saving new presets within it.
- load
- Load a preset.
- save
- Save a new preset.
- < > (category)
- Loads the next/previous folder of presets in the preset directory.
- < > (preset)
- Loads the next/previous preset.
- nudge
- Applies a small amount of randomization to all tonal parameters and modes. Randomization can be bypassed per control in individual parameter modulation menus. Useful for creating slight variations of sounds.
- rand
- Completely randomizes all tonal parameters and modes. Randomization can be bypassed per control in individual parameter modulation menus. Use this to create inspiring new sounds and ideas.
- reset
- Resets all parameters to their default settings.
Modulation#
All Noise Engineering plugins feature a comprehensive routing system making use of a variety of modulation types and sources. When modulation is enabled on a parameter, a box showing the range of enabled modulation will appear, and a small indicator will move within the range box showing the exact position of the modulation.

Types of modulation#
Parameters can be modulated from a variety of sources:
- LFOs
- Four onboard LFOs that offer a variety of modes, from simple waveforms to step sequencers. More detail on LFO modes can be found in the section below titled “Modulation page.”
- Macros
- Four macro sliders can be assigned to any number of parameters. The macros can in turn be mapped to MIDI controllers, automated, or modulated with other LFOs.
- Env
- Envelope follower. Turns the dynamics of the incoming signal into a modulation source.
- MIDI CC
- Parameters can be assigned to MIDI CCs. (Note: MIDI mapping of effects is not supported in all DAWs.)
Modulation Assignment#
When a parameter is right-clicked (Control+click on Mac), a context menu appears with modulation routing options:
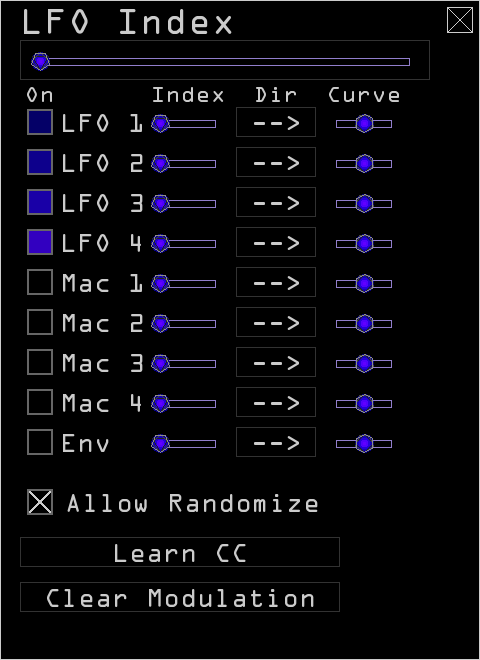
- Parameter slider
- A copy of the parameter being modulated, for easy adjustment.
- On
- Each modulation source has a checkbox; when checked, modulation from that source is enabled.
- Index
- Sets the amount of modulation from a particular source. Fully left, modulation is bypassed.
- Dir
- Direction. Sets the polarity and inversion of incoming modulation.
- --> (unipolar): modulates from the point selected on the parameter up to the level indicated by the Index setting
- <-> (bipolar): modulates around the center point set by the parameter
- <-- (inverted unipolar): opposite modulation from unipolar
- >-< (inverted bipolar): opposite modulation from bipolar
- Curve
- Each modulation source has a Curve slider that changes how modulation affects the parameter. In the center, modulation is linear, and the parameter movement matches incoming modulation exactly. To the right modulation is more logarithmic, and to the left more exponential.
- Allow Randomize
- When checked, this parameter can be randomized when “rand” (Tone page) is clicked.
- Learn CC (only visible when MIDI Learn is checked on the Config > Interface page)
- Click this to enable MIDI CC learn on a parameter. Move a parameter on your MIDI controller and the plugin will exit learn mode and the parameter will now respond to that CC. If clicked by mistake, click
Waiting on CCto exit learn mode. ClickForget CCto remove an assignment. - Clear modulation
- Resets modulation checkboxes, amounts, direction, and curve. Does not affect CC assignments.
Modulation Page#
Click the sections in the left column to navigate to that page and edit modulator settings and routings.
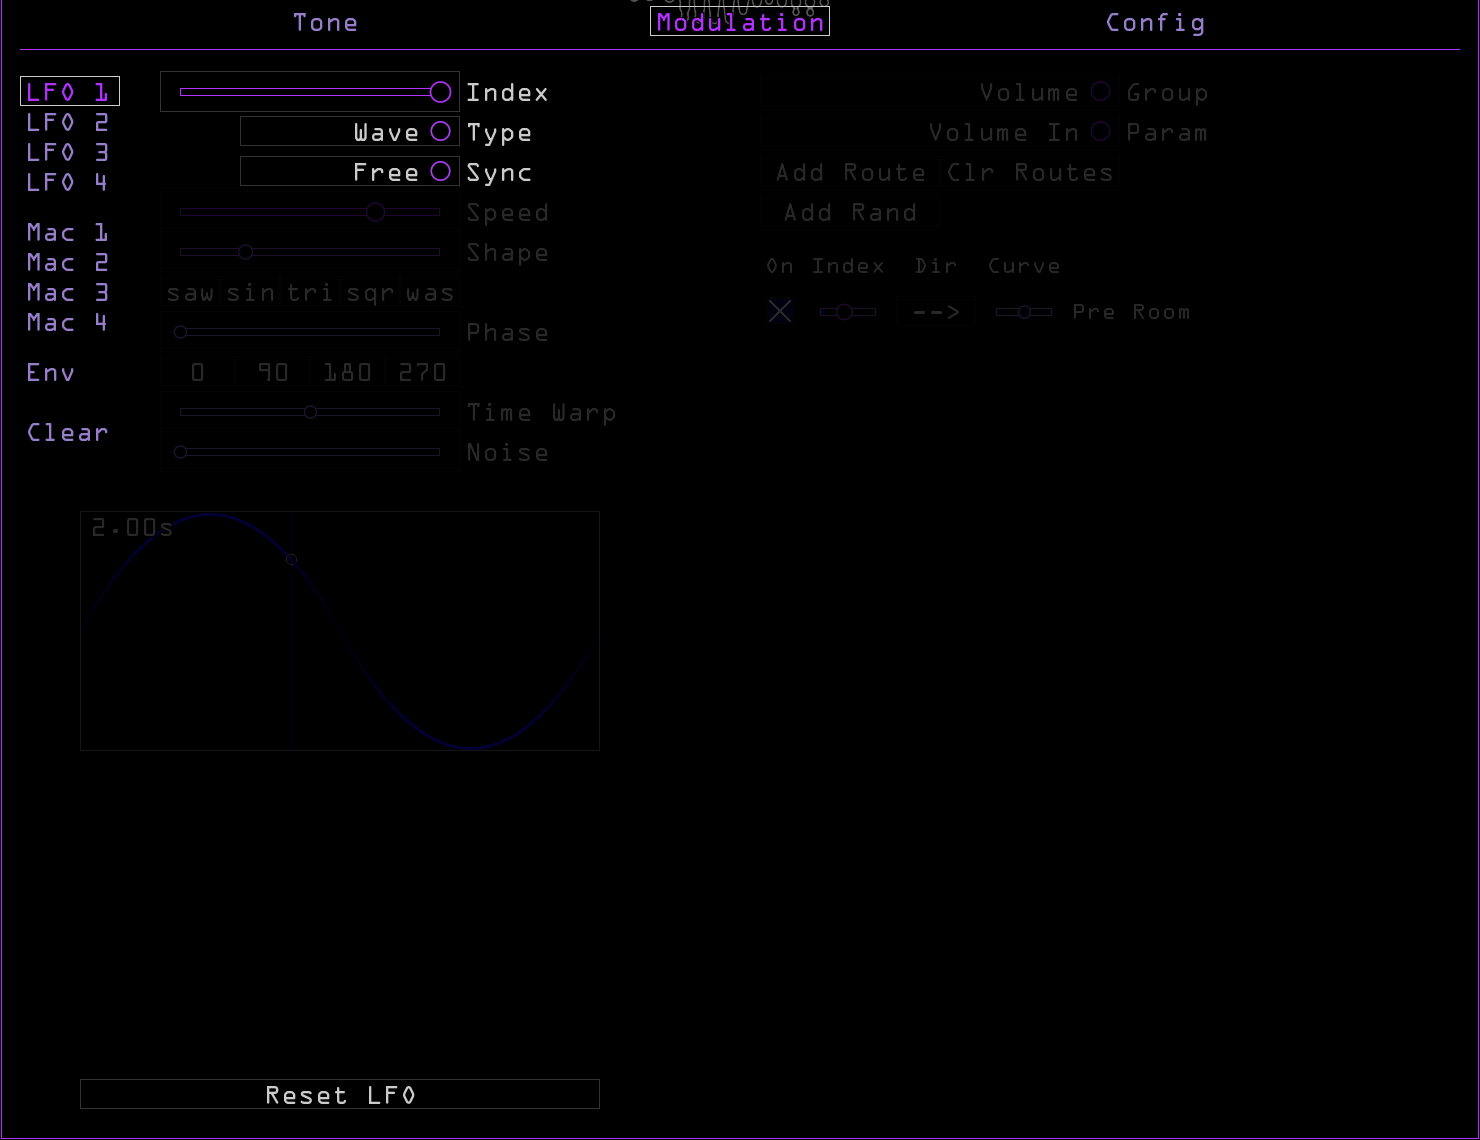
LFO 1-4#
- Index
- Sets the modulation range of the LFO.
- Type
- Sets the type of LFO. Options include Wave, Step, and ADR, described in detail in the sections below.
- Sync
- Sets the source of timing for the modulator. * Free: A single completely freerunning LFO; never resets. * Transport: Speed is set in seconds, but the LFO follows the transport of the DAW. * Tempo: A single LFO that is synced to the DAW’s tempo and transport.
- Speed/Beats
- Sets the rate of the LFO. In unsynced modes, this is a slider that sets the rate in seconds. In synced modes (Tempo and Poly Tempo), this is a fraction that sets the rate in beats (for example,
4/1would be equal to 1 bar in 4/4 meter). If a synced mode is selected, the rate can be doubled or halved with the*2and/2buttons respectively. - Reset LFO
- Resets the LFO back to its default state, respecting Type.
Type: Wave#
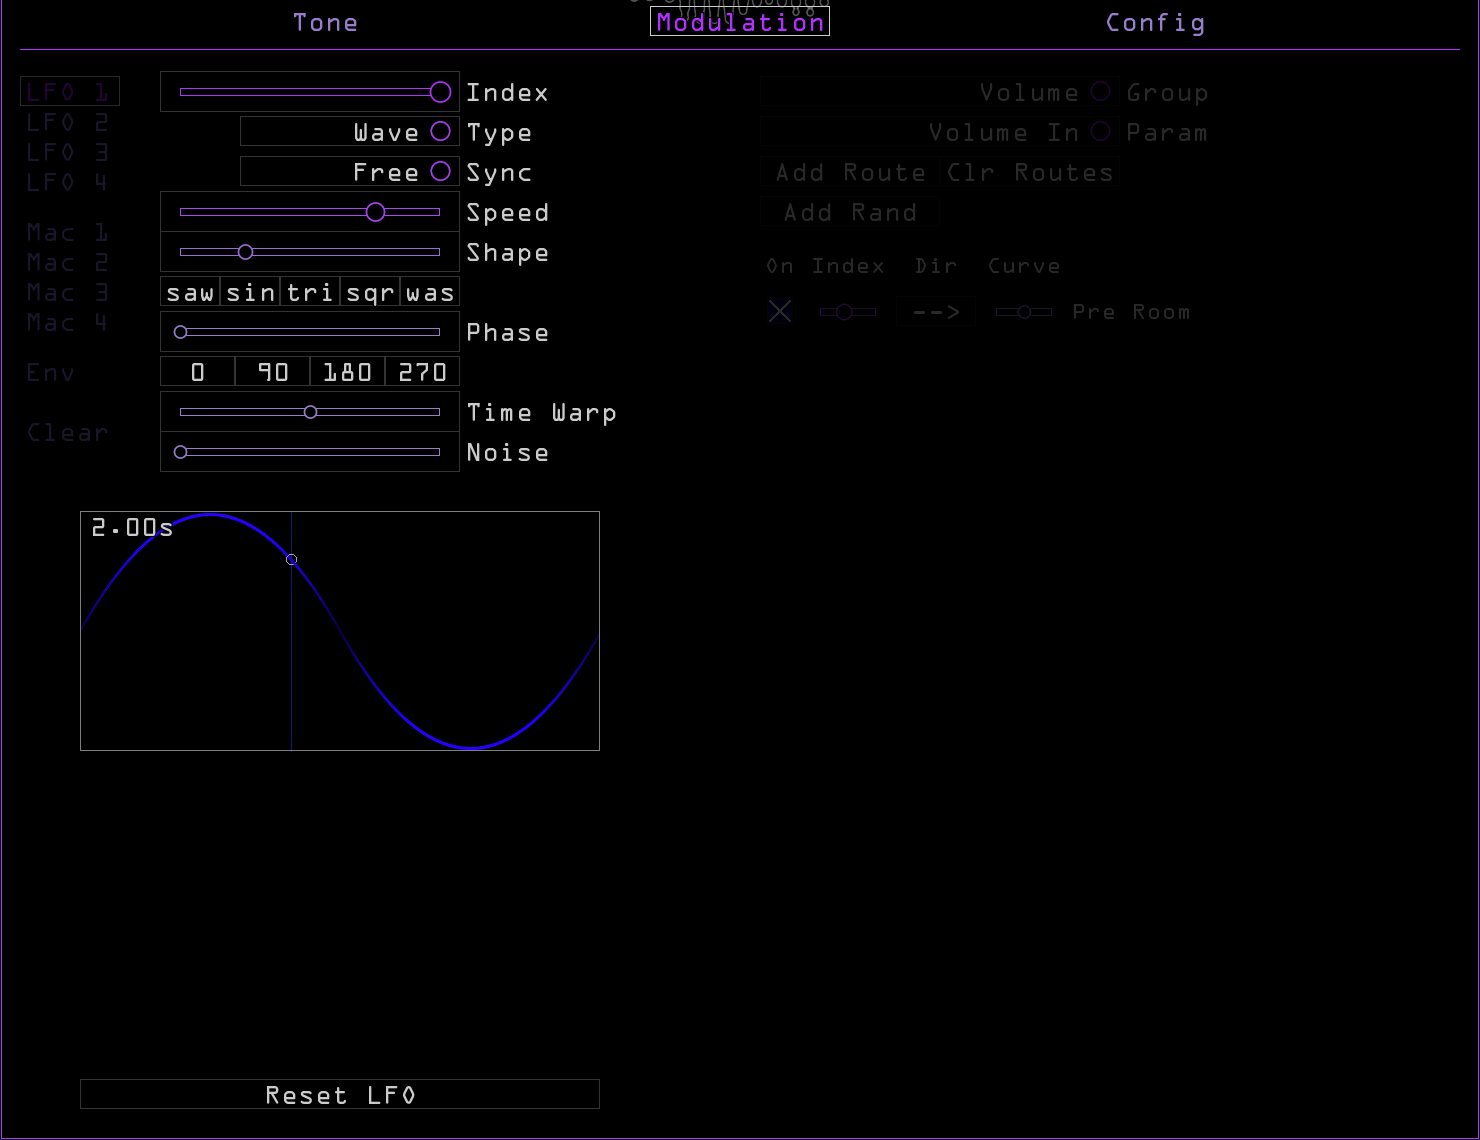
- Shape
- Morphs between different waveforms.
- saw/sin/tri/sqr/was
- Selects a shape preset for the waveform. Choose saw, sine, triangle, square, or inverted saw.
- Phase
- Changes the starting point of the wave.
- 0/90/180/270
- Selects a preset for the phase of the waveform.
- Time Warp
- Skews the timing of the waveform.
- Noise
- Adds randomness to the waveform.
- Color (only visible when
Noiseis above minimum) - Changes the intensity of randomness added to the waveform.
Type: Step#
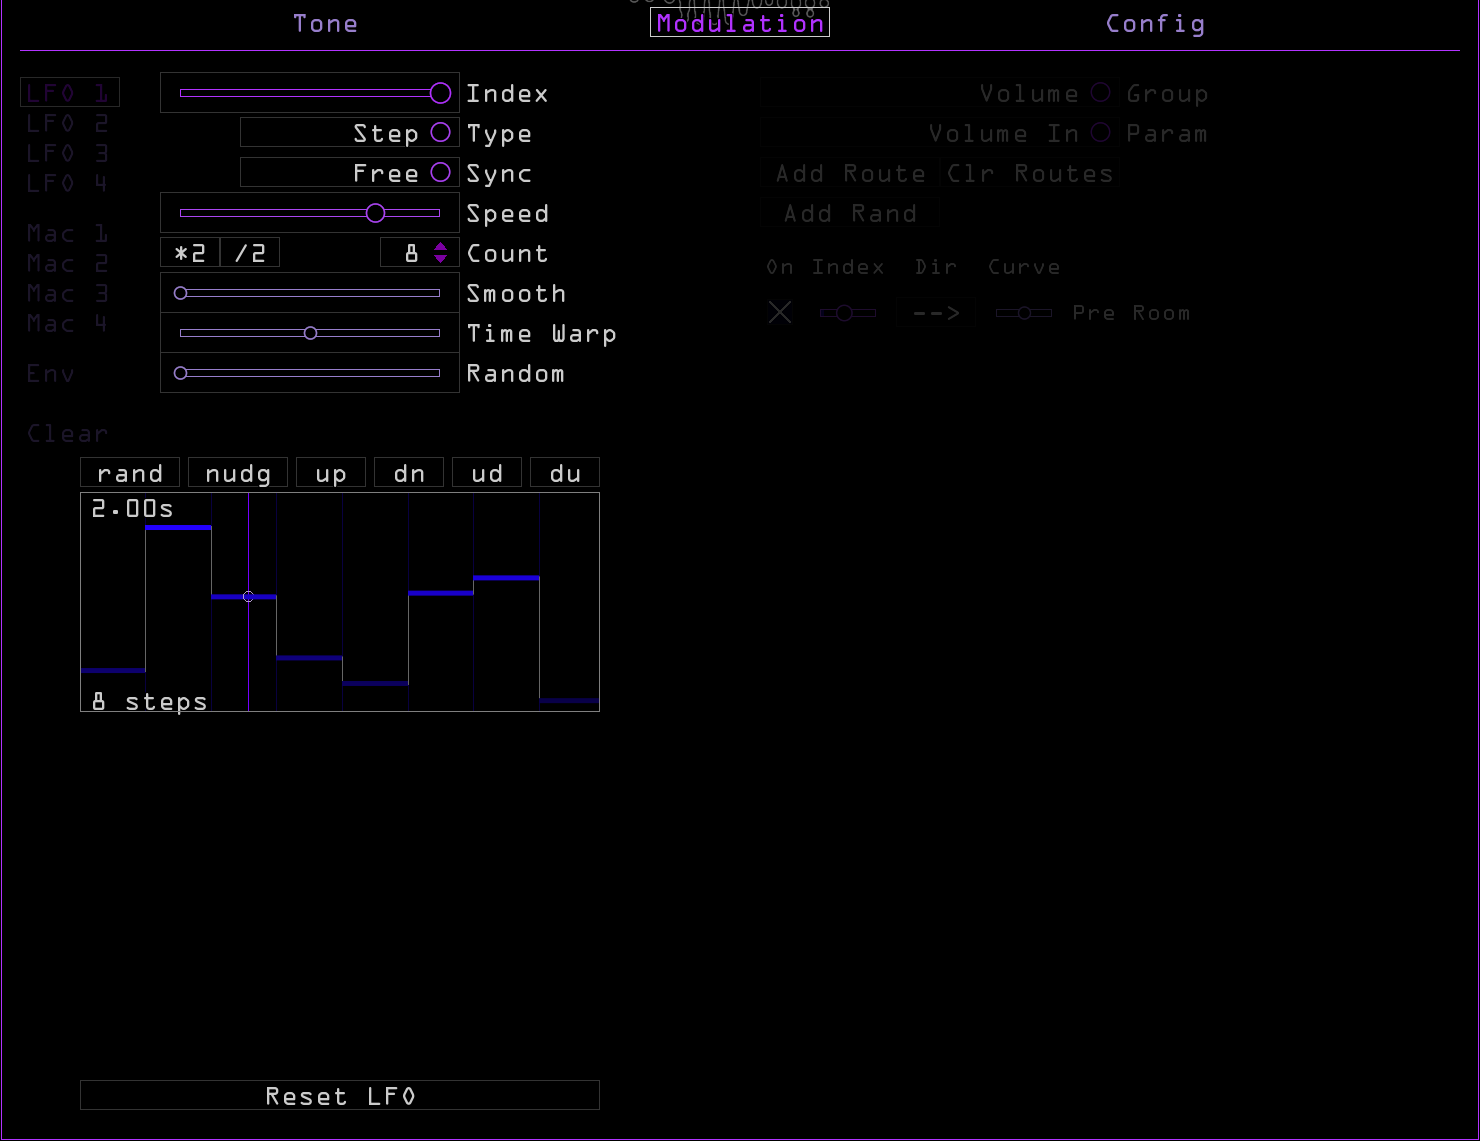
- Speed/Beats
- Sets the rate of the sequencer. In unsynced modes, this is a slider that sets the rate in seconds. In synced modes, this is a fraction that sets the rate in beats (for example, 4/1 would be equal to 1 bar in 4/4 meter). If a synced mode is selected, the rate can be doubled or halved with the *2 and /2 buttons respectively.
- Count
- Sets the steps in the sequencer; the up and down arrows change the count by one, and the *2 and /2 buttons respectively double or halve the count.
- Smooth
- Adjusts how smooth the transition between steps is.
- Time Warp
- Skews the timing of the sequencer.
- Random
- Adds per-step randomization to the sequence.
- Graph
- Edit your sequence here by clicking and dragging or use the preset buttons: * rand: Randomizes the sequence entirely. * nudge: Slightly changes the values of each step. * up: Generates an ascending pattern across the steps. * dn: Generates a descending pattern across the steps. * ud: Creates a triangle pattern across the steps. * du: Creates an inverted triangle pattern across the steps.
Macro#
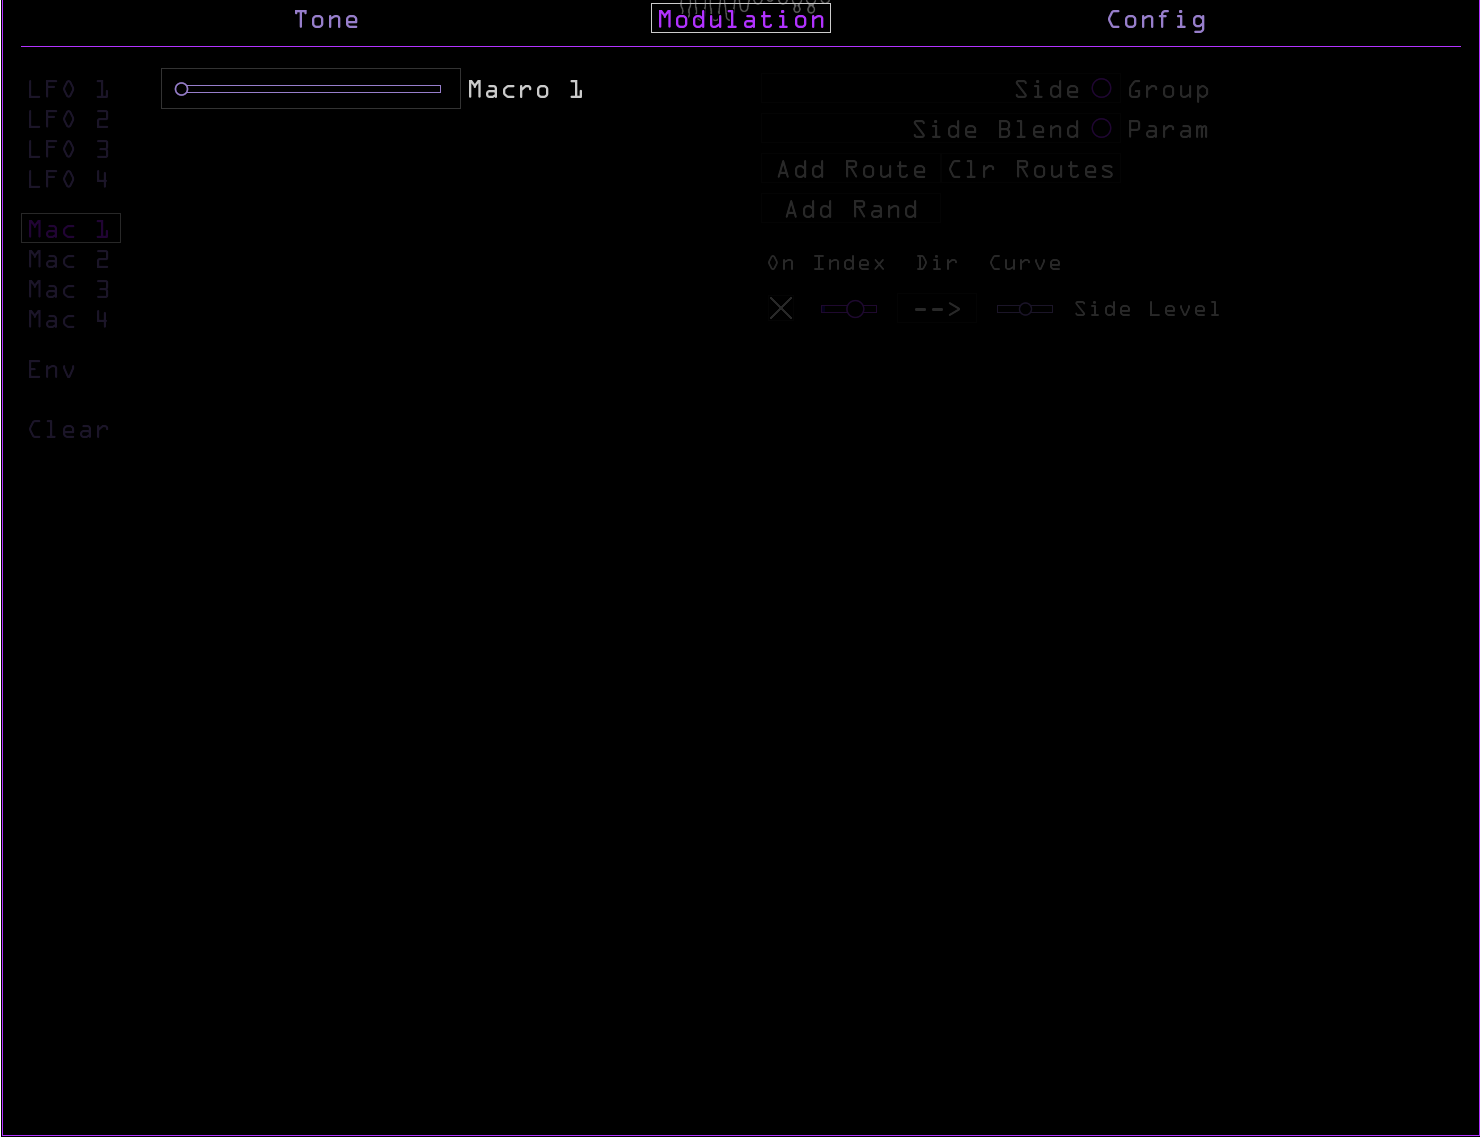
- Mac 1-4
- Four sliders that can be assigned to any number of other parameters, and modulated by LFOs or MIDI CCs.
Env#
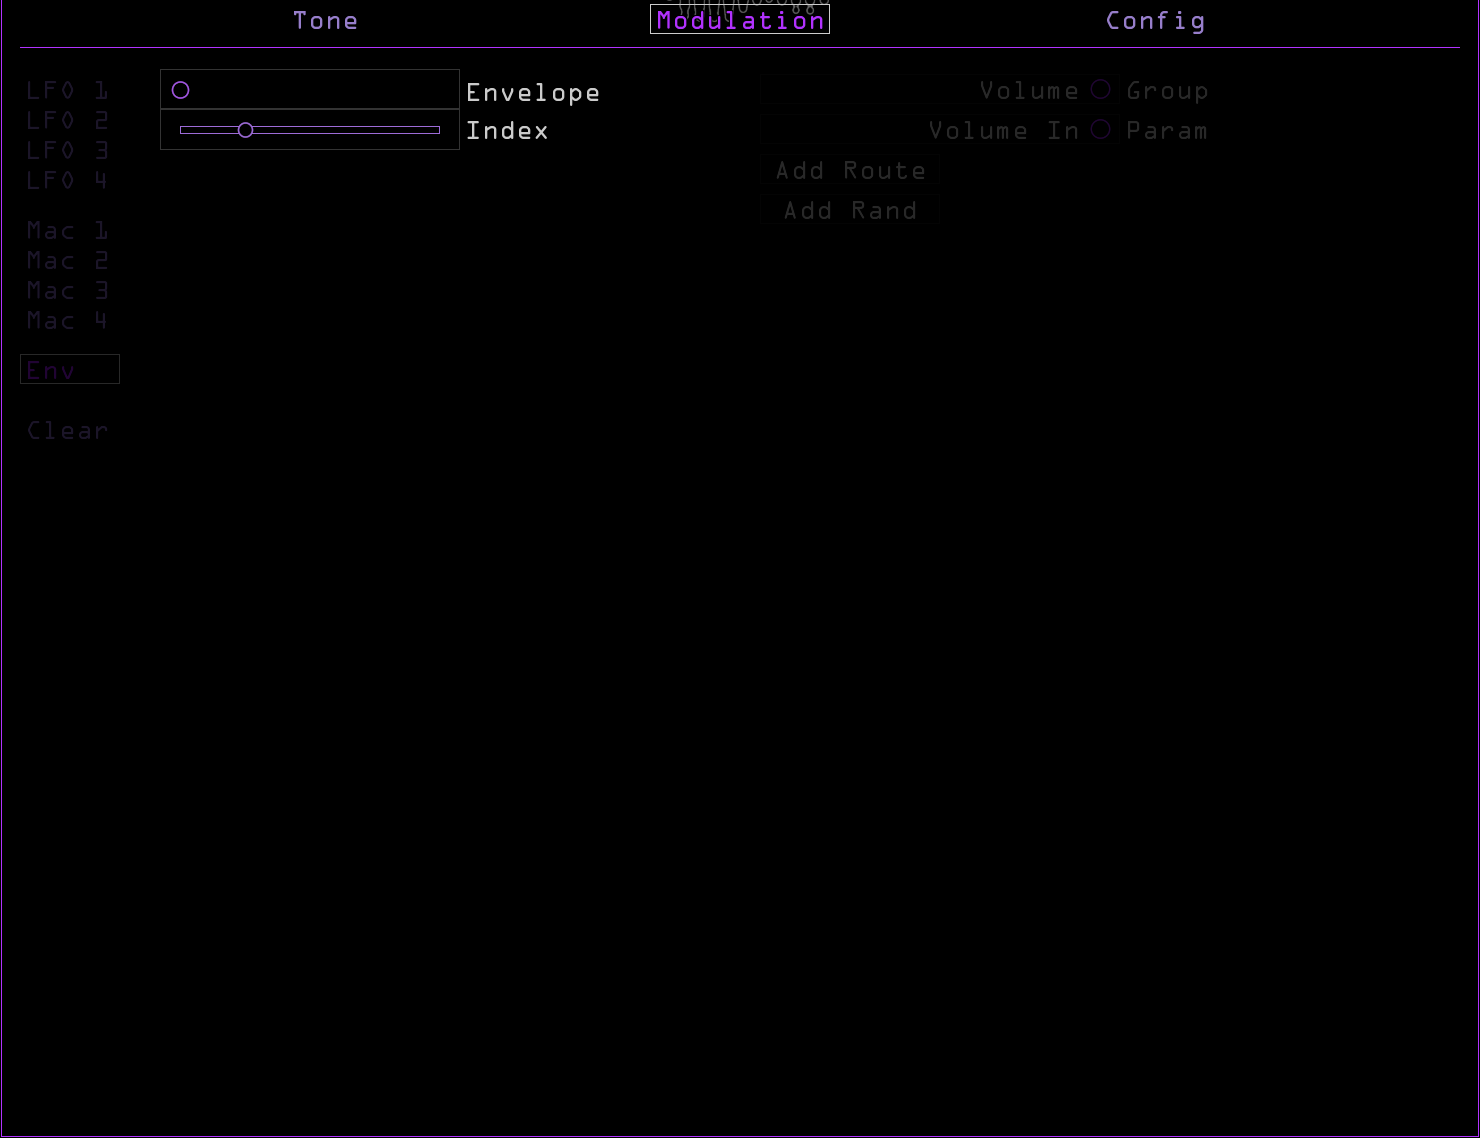
- Envelope
- An indicator of the current Envelope modulator value.
- Index
- Sets the range of the Envelope modulator.
Clear#
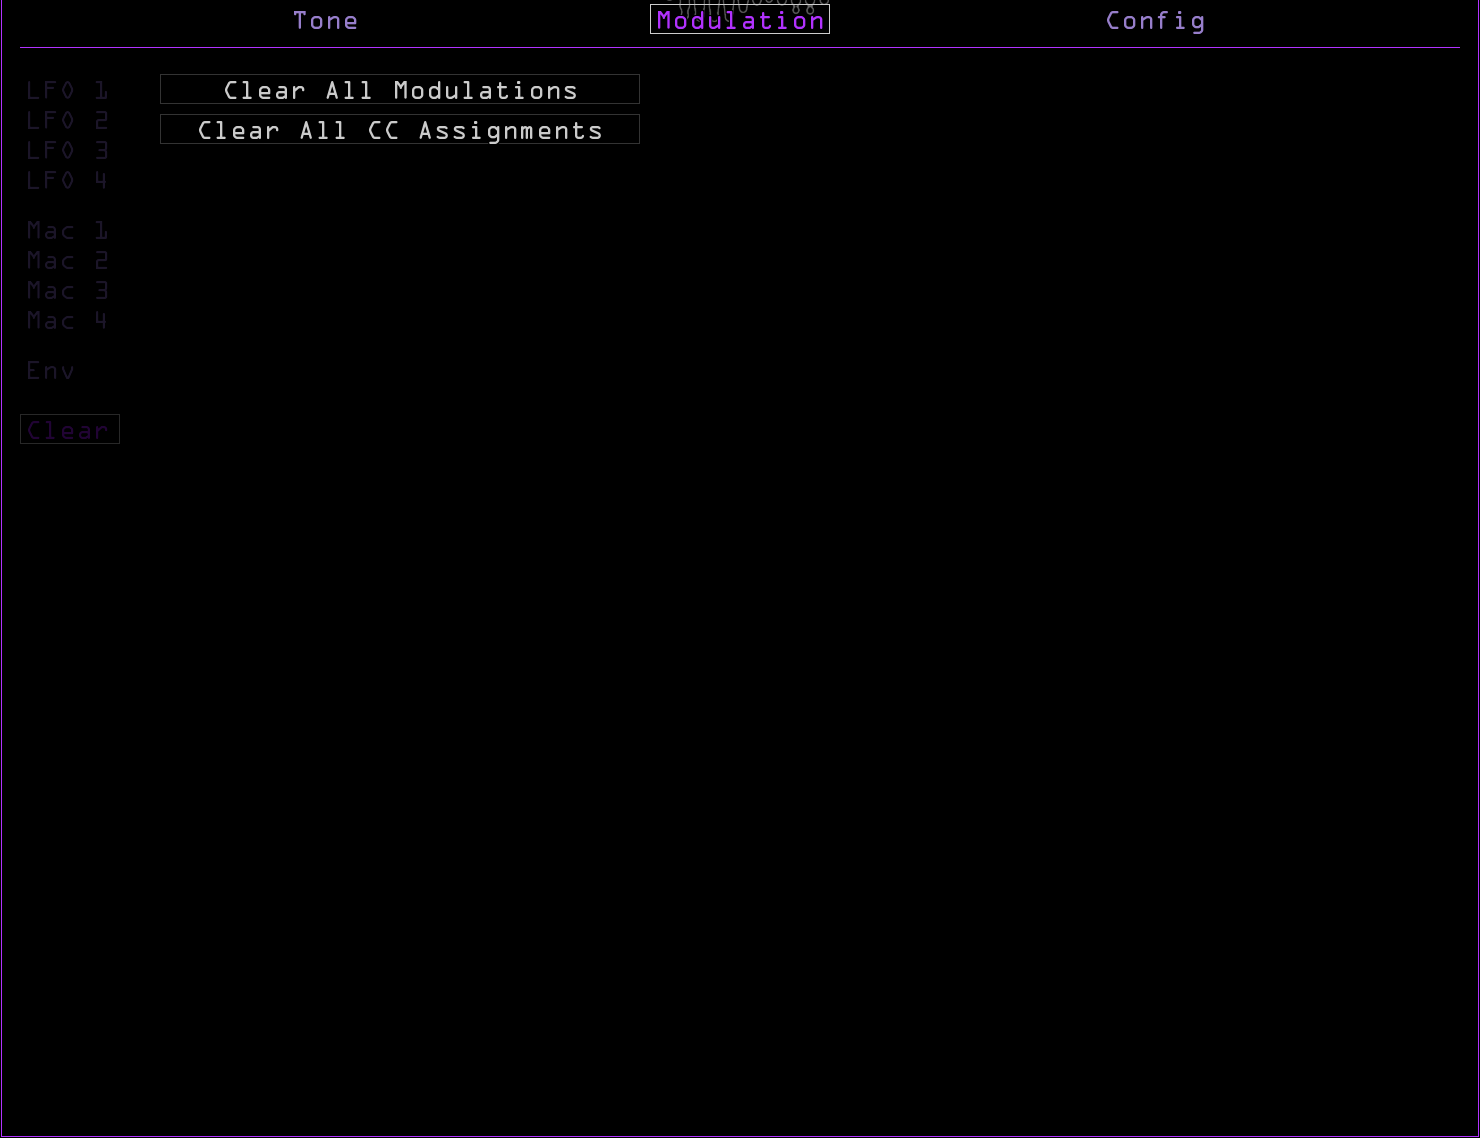
- Clear All Modulation
- Clicking this removes all modulation routings from the patch. Use it wisely.
- Clear All CC Assignments
- Clicking this clears all MIDI CC mappings.
Modulated parameters column#
When a modulator (LFO, Macro, or Other) is assigned to a parameter, the parameter will appear in this list when on that modulator’s page. For instance, if LFO 1 is modulating Attack, click LFO 1 on the left side to view the modulation amount, curve, and checkbox for Attack (and any other LFO 1 modulated parameters) on the right.

- Group
- Selects a category of parameters, grouped by location in the interface. For example, the Fold parameter is in the Oscillator group.
- Param
- Selects a parameter from the current Group category.
- Add Route
- Adds modulation routing for the selected parameter from the selected modulator.
- Clr Routes
- Click twice to remove all modulation assignments for the current modulator. To remove a single assignment simply uncheck the On box.
- Add Rand
- Adds a random modulation destination.
- On
- Each modulation source has a checkbox; when checked, modulation from that source is enabled. When unchecked on this page, it is removed.
- Index
- Sets the amount of modulation from a particular source. Fully left, modulation is bypassed.
- Dir
- Direction. Sets the polarity and inversion of incoming modulation: * --> (unipolar): modulates from the point selected on the parameter up to the level indicated by the Index setting * <-> (bipolar): modulates around the center point set by the parameter * <-- (inverted unipolar): opposite modulation from unipolar * >-< (inverted bipolar): opposite modulation from bipolar
- Curve
- Each modulation source has a Curve slider that changes how modulation affects the parameter. In the center, modulation is linear, and the parameter movement matches incoming modulation exactly. To the right modulation is more logarithmic, and to the left more exponential.
Config#
Config Page#
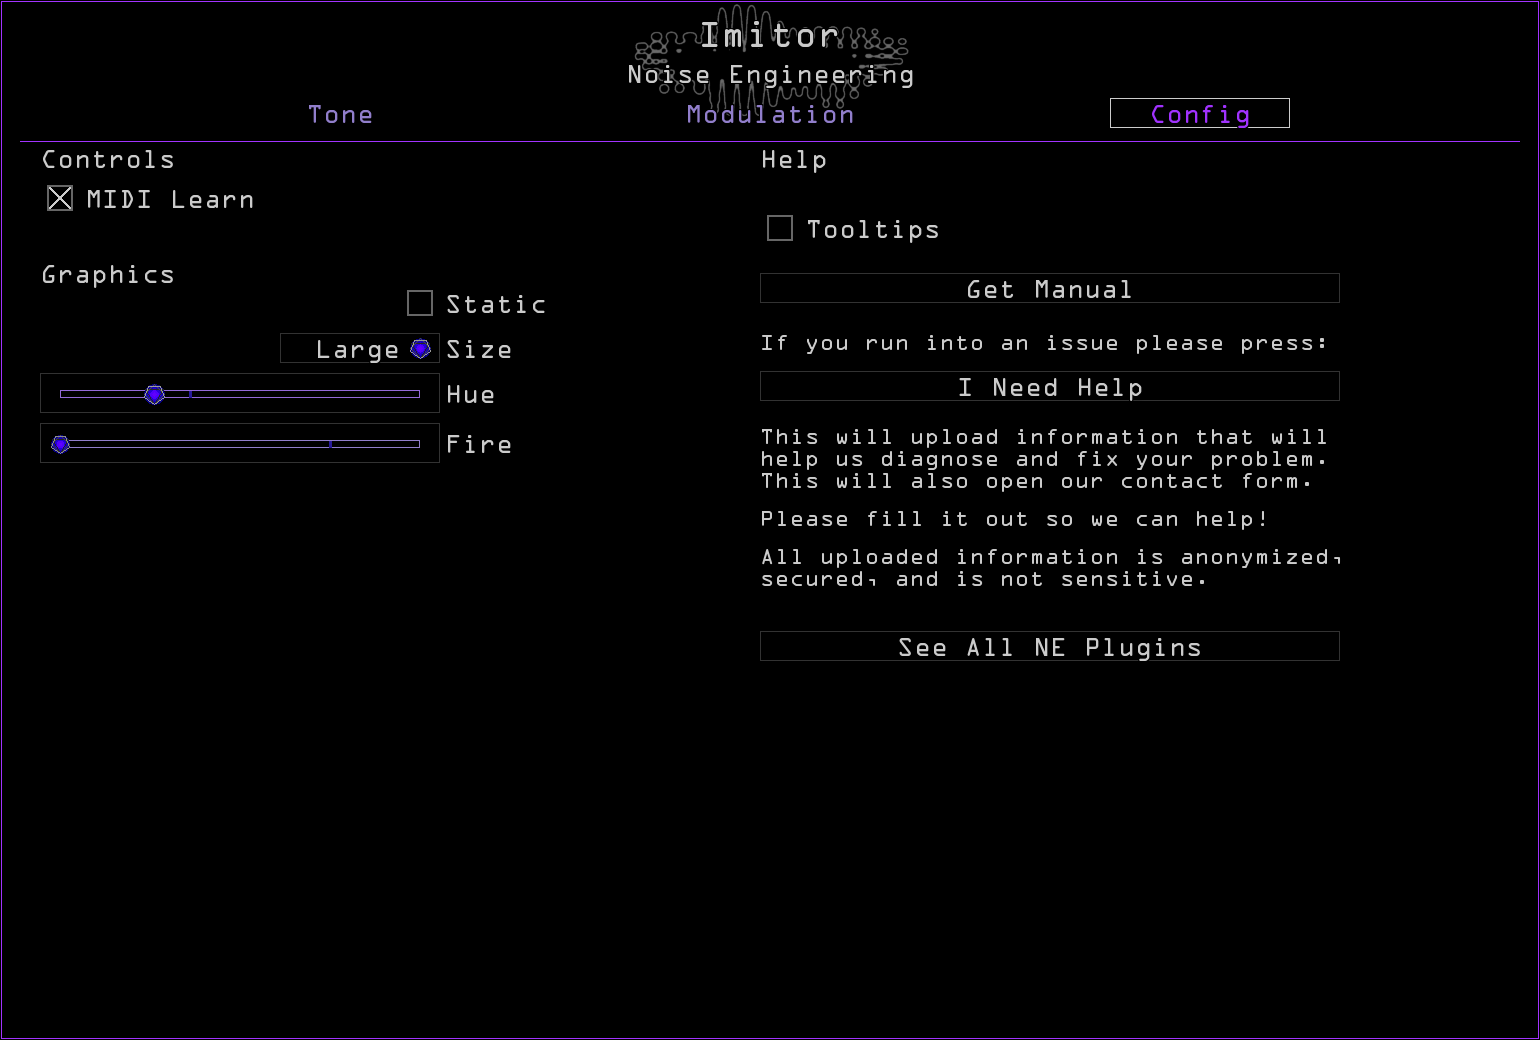
- MIDI Learn
- Enables MIDI mapping (right-click/cmd-click a parameter to bring up the modulation menu and click Learn CC).
- Static
- Adds some retro flare to the plugin GUI.
- Size
- Sets the size of the plugin window.
- Hue
- Sets the color scheme of the plugin.
- Fire
- Adds some attitude to the plugin GUI.
- Tooltips
- Enables helpful tooltips when you mouse over parameters.
- Get Manual
- Opens the plugin product page.
- I Need Help
- Uploads anonymized system information used for troubleshooting and opens the support form. If you’re having an issue please press this button and fill out the form to tell us what the problem is! You can also always reach us at noiseengineering.us/pages/contact. Drop us a line and we’ll get back to you within two business days.
- See All NE Plugins
- Opens the plugin shop. Check out all the Noise!
Plugin Locations#
Plugin presets install to the following locations:
- Windows
- C:\Users\Public\Documents\Noise Engineering\
- Mac
- /Users/[name]/Library/Audio/Presets/Noise Engineering/
Noise Engineering plugins are installed to the default locations for the specified plugin formats. In a majority of cases, plugins will not need to be moved. In the rare instance that you need to move your VST plugins, find them in the following locations:
- Windows
- C:/Program Files/Common Files/VST3/Noise Engineering/
- Mac
- /Library/Audio/Plug-Ins/VST3/
Note that AU and AAX plugins cannot be moved. For reference, they are installed here:
- Mac AU
- /Library/Audio/Plug-Ins/Components/
- Mac AAX
- /Library/Application Support/Avid/Audio/Plug-Ins/Noise Engineering/
- Windows AAX
- C:/Program Files/Common Files/Avid/Audio/Plug-Ins/Noise Engineering/

About NE#
Noise Engineering is located in Los Angeles, California. We started around 2014 when Chief Noisemaker Stephen McCaul wanted a hobby for his off time from his day job and started making Eurorack modules in a spare bedroom at home. One thing led to another and a couple of years later, he and wife Kris Kaiser quit their day jobs and took the company full time. Noise Engineering has since grown in size and has established itself as a well-regarded and innovative synthesizer brand, with products in Eurorack, 5U, and multiple software platforms.
Special thanks#
- Kerry Leva
- Matt Lange
- Rene Boscio
- Shanda Nunez
- Broken Circuits
- Yugo Oshima
- Starthief
- Dave Dean
- Douglas Hill
- Hans Besselink
- James tobias
- Josh Sager