Cymbal Legio#
Granular cymbal, high-hat, and ride voice
Overview#
Cymbal Legio is our take on a metallic percussion voice. Instead of synthesizing cymbals like some drum machines, Cymbal uses granular processing of real drum samples recorded by friend of Noise Engineering (and Noise Engineering Artist) Arthur Hnatek. This results in incredibly realistic cymbal sounds that don't sound like static samples and are still tweakable like synth drums should be.
- Type: Metallic percussion voice
- Size: 6 HP
- Depth: 1.5 inches
- Power: 2x5 Eurorack
- +12 V:
140mA - -12 V:
22mA
Etymology#
Cymbal -- from Greek, by way of Latin: “A bowl or cup”
Legio -- from Latin: “legion, army”
“Legion of cup-shaped things”
Color code#
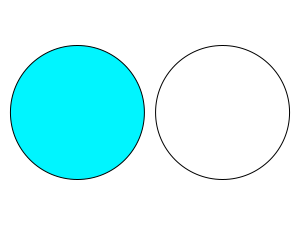
On boot, the Legio's LEDs will shine with this color pattern to indicate that it is running the current Cymbal firmware:
Power#
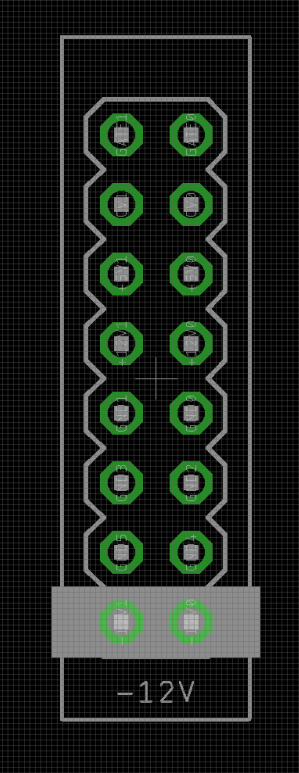
To power your Noise Engineering module, turn off your case. Plug one end of your ribbon cable into your power board so that the red stripe on the ribbon cable is aligned to the side that says -12 V and each pin on the power header is plugged into the connector on the ribbon. Make sure no pins are overhanging the connector! If they are, unplug it and realign.
Line up the red stripe on the ribbon cable so that it matches the white stripe and/or -12 V indication on the board and plug in the connector.
Screw your module into your case before powering on the module. You risk bumping the module's PCB against something metallic and damaging it if it's not properly secured when powered on.
You should be good to go if you followed these instructions. Now go make some noise!
Noise Engineering modules are reverse protected. If you accidentally installed it with the red stripe up, simply remove the power and place it correctly.
A final note. Some modules have other headers -- they may have a different number of pins or may say "not power". In general, unless a manual tells you otherwise, do not connect those to power.
Input & output voltages#
Legio’s CV-modulation inputs expect signals from 0v to +5v.
The Morph input’s range is -2v to +5v.
The Hit input responds to a rising edge around +1.6v.
The audio inputs are AC coupled and respond to any Eurorack audio signals.
The audio output can reach up to 16v peak-to-peak.
Interface#
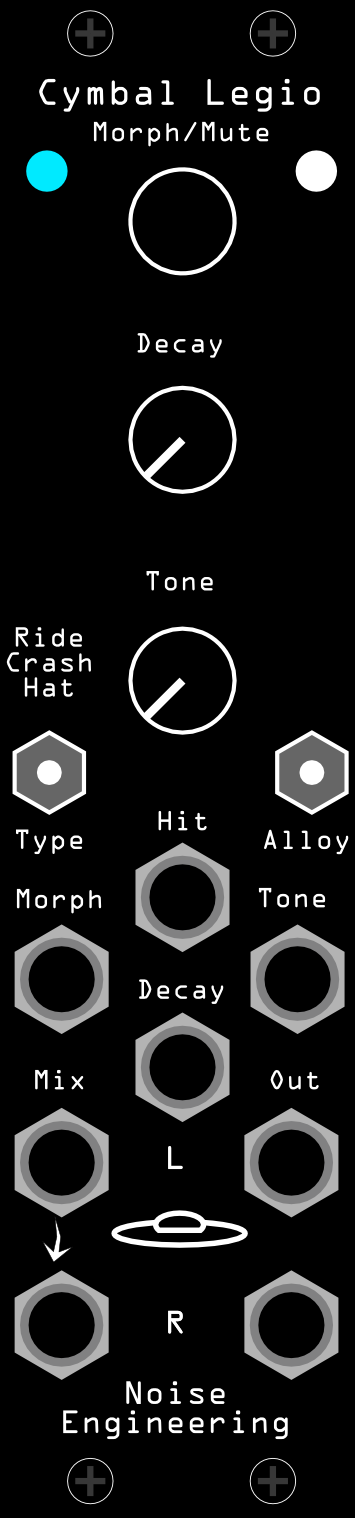
- Morph (encoder+CV input)
- Morphs between grain sources.
- Tap to mute/unmute the voice.
- Decay (potentiometer+CV input)
- Sets the decay time for the cymbal.
- Tone (potentiometer+CV input)
- Sets the brightness of the cymbal.
- Type (switch)
- Selects the type of cymbal.
- Alloy (switch)
- Selects the metal used for the cymbal.
- Hit (trigger input)
- Triggers the cymbal.
- Mix L/R
- Audio inputs. Audio here is mixed with the drum voice and passed through to the outputs. The L jack is normaled to the R jack if R is left unpatched.
- Out L/Out R
- Audio outputs.
Patch tutorial#
Patch a trigger pattern to the Hit input. Select a cymbal Type that suits your patch, and adjust Morph, Tone, and Alloy to taste.
Decay is an excellent accent destination. Patch accent gates here to vary your cymbals.
Note
If using multiple Legio drum voices, they can be chained together without an external mixer. Just patch the output of one to the input of the next.
However, order matters: Kick will duck all the percussion voices that come before it. For ultimate impact, put Kick at the end of the chain; or, if some drums are more important, put them after Kick so they aren't ducked out of the way.
Signal flow#
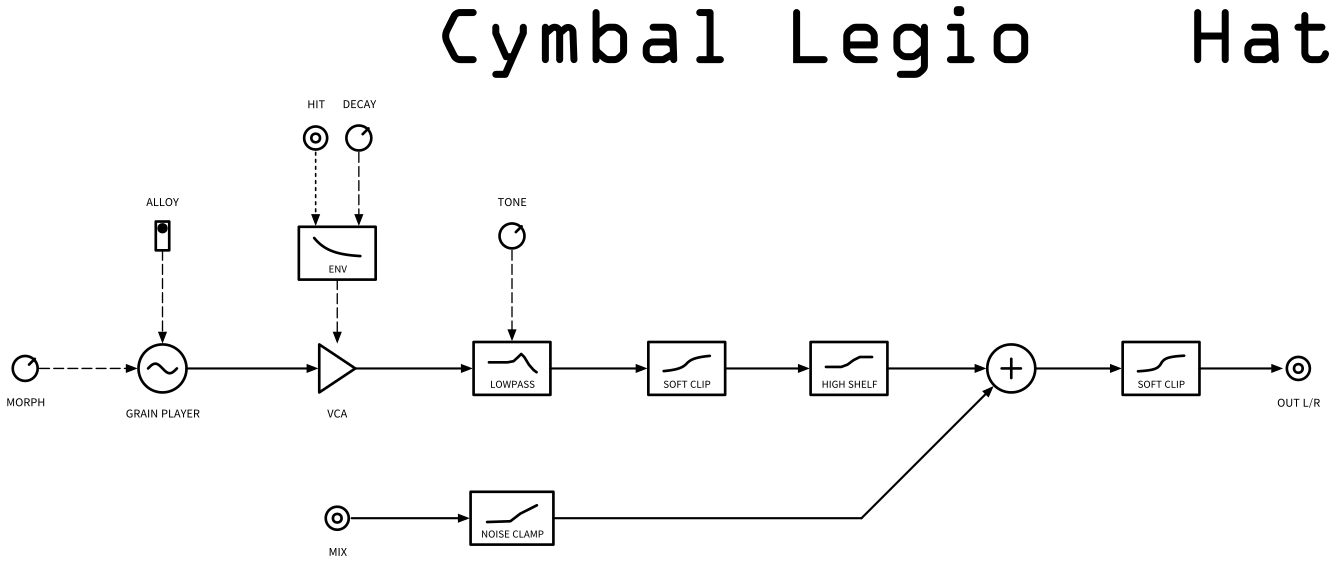
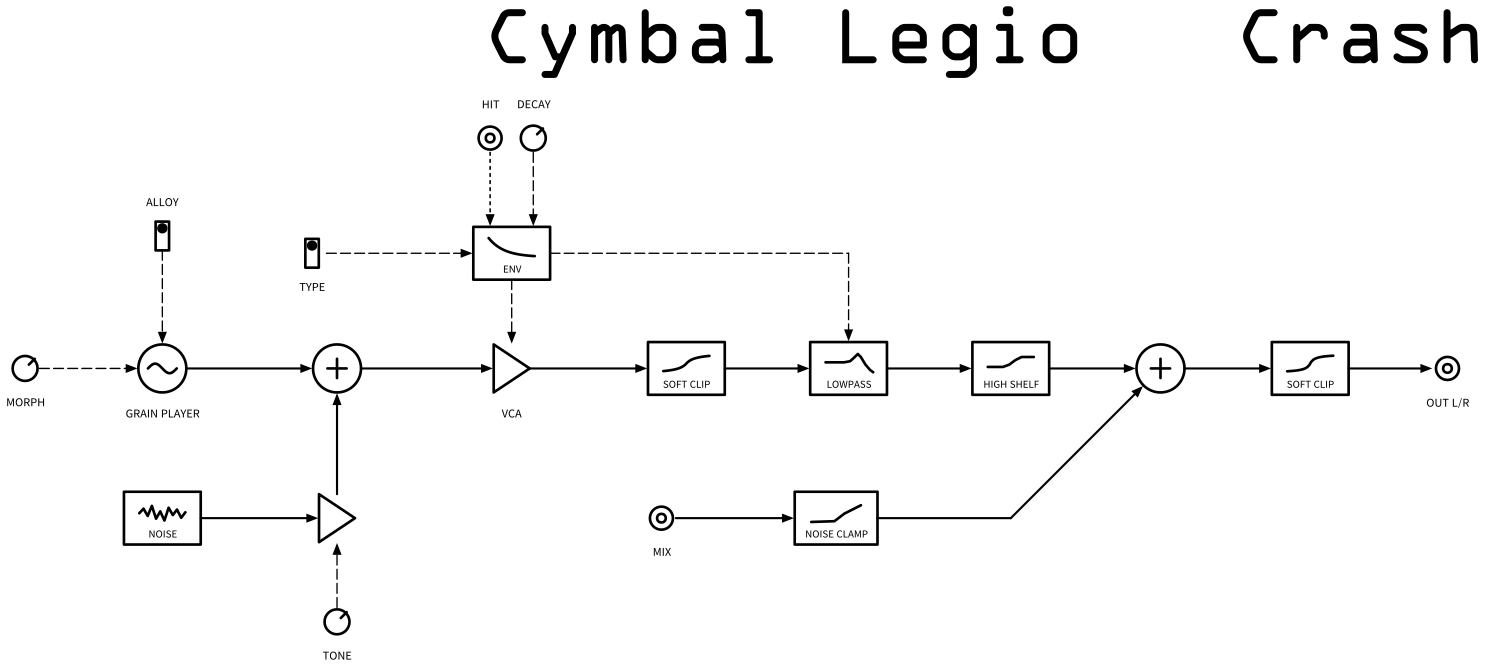
Design Notes#
Cymbals are hard to synthesize. And it turns out that different people have different expectations of how they want their cymbals to sound. Stephen and Markus went round and round on this firmware arguing the finer points, until we all thought, hey, we know a world-class drummer. He probably has some recordings we could sample. Kris emailed our pal Arthur Hnatek and he wrote back almost immediately with a bunch of great sounds that Stephen took and ran with. The samples gave the firmware the true-to-nature sound and the granular engine gave just enough to add a nice synth feel.
Special thanks#
- Arthur Hnatek
- Enthusiastic Electrons
- Everett Dolgner
- Frequency Divide
- itsMasterIll
- Ozon
- starthief